Authentication and authorization
To use private API calls, you must authenticate the identity of a user or app making the request. Users and apps are authorized to access various objects and fields through the permissions assigned to them.
Introduction
Authentication is accomplished by passing a secure access token in the Authorization HTTP header of API requests.
When you pass a token in the Authorization header, you can authenticate with either a user or an app through the following methods:
- Use
JWT <token>to authenticate users - Use
Bearer <token>to authenticate apps
User authentication (JWT)
For instructions on using Firebase for SSO, see Using Firebase Authentication.
Users can be authenticated using the JWT authentication method.
First you'll need to generate an API access token associated with your user account, then you can pass this token in the header of API requests to perform operations with this user's level of access:
{
  "Authorization": "JWT <token>"
}
The authenticated user's permissions determine what they can do in the API. Users can be staff members, which are the marketplace operators and seller admins on your platform, customers, which are individuals who make purchases, or both. The isStaff field on a user identifies whether they are a staff member.
Retrieve JWT token
Use the tokenCreate mutation to generate your access token. You'll need to pass your user email and password:
mutation {
  tokenCreate(email: "login@example.com", password: "mypassword") {
    token
    refreshToken
    csrfToken
    accountErrors {
      message
    }
  }
}
Retrieve the token from the tokenCreate response, which will look similar to the following:
{
  "data": {
    "tokenCreate": {
    "token": "eyJhbGciOiJIUzI1NiIsInR5cCI6IkpXVCJ9.a123-45678abc_12-lmnopq14rFAKE",
    "refreshToken": "ref-123456789abcdefFAKE",
    "csrfToken": "csrf-987654321abcdefFAKE",
    "accountErrors": []
    }
  }
}
Use JWT auth
Pass your secure access token in Authorization header of API requests:
{
  "Authorization": "JWT eyJhbGciOiJIUzI1NiIsInR5cCI6IkpXVCJ9.a123-45678abc_12-lmnopq14rFAKE"
}
App authentication (Bearer)
Apps can be authenticated using the Bearer authentication method. First you'll need to create a custom app and copy the automatically-generated API token, then you can pass this token in the header of API requests:
{
  "Authorization": "Bearer <token>"
}
A combination of the app's permission and the attached user's permissions, if applicable, determine what the app can do in the API. For more information on app permissions, see the Custom Apps article.
Retrieve app token
The access token is shown when you first create a custom app.
You can also generate new tokens through either the Dashboard or API. Toggle the following tabs for instructions.
- Dashboard
- API
- From the Dashboard, go to Settings -> Apps -> Custom Apps and open the app.
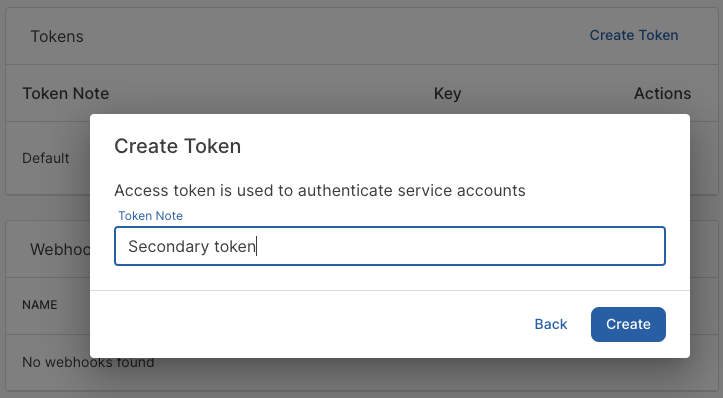
- In the Token section, select Create Token to generate a new access token for the app.
- In the Create Token window, enter a name to identify the token, then select Create.
The new token will be generated and displayed. Note that it will only be displayed once.

Run the appTokenCreate mutation to get a new token. You'll need the id of the app, which you must pass in the app field:
mutation {
  appTokenCreate(name: "My app token", app: "QXBwOjIw") {
    authToken
    appToken {
      name
      authToken
      id
    }
    appErrors {
      message
    }
  }
}
Retrieve the authToken from the response, which will look similar to the following:
{
  "data": {
    "appTokenCreate": {
      "authToken": "12ab345CdefGHRFtuvwxyZ2AB1C2dEF",
      "appToken": {
        "name": "My app token",
        "authToken": "AB1C",
        "id": "QXBwVG9rZW46Mjc="
      },
      "appErrors": []
    }
  }
}
Use bearer auth
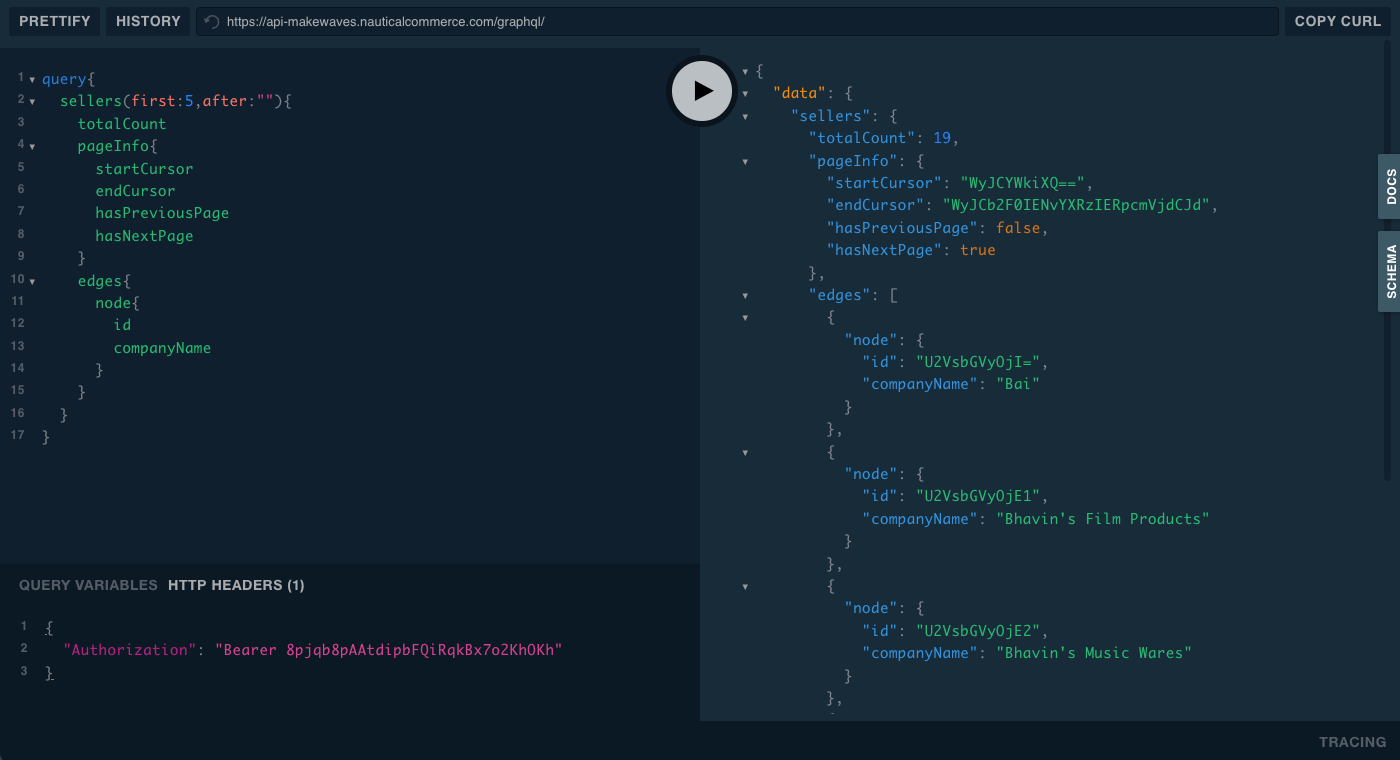
Pass the token in the Authorization header of API requests:
{
  "Authorization" : "Bearer 12ab345CdefGHRFtuvwxyZ2AB1C2dEF"
}
See the following example, where the app token is supplied to get the first five sellers:
