Customizing the Storefront
This article provides instructions on how to make basic changes to the reference storefront.
You can start editing the pages exported by the reference storefront by going to the /src/pages directory and opening the page you want to modify. For example, /src/pages/index.tsx corresponds to the home page.
The pages/api directory is mapped to /api/*. Any files within this directory are treated as API routes instead of React pages.
When running the development server, it will automatically reload pages as you make code changes.
These instructions apply to the reference storefronts cloned in January 2024 or later, which leverage Tailwind UI for layouts throughout the storefront. To explore additional components, you can visit Tailwind UI.
Styling
You can use any styling approach compatible with React and Next.js, such as global CSS, CSS modules, or styled-components.
Global styles are defined in src/styles/globals.css. The reference storefront utilizes tailwindcss as the CSS framework. You can customize the tailwind.config.js configuration file to customize the theme defaults.
Logo and favicon
The logo, favicon, and other public resources are stored in the /public directory.
A sample logo and favicon are provided. Simply replace these with a new logo.png and favicon.ico to update the reference storefront with your branding.
Promo banner
The promo banner uses the Tailwind UI Banners component. This banner, when defined, is displayed site-wide, positioned above the navigation bar.

Update the banner
To update the promo banner, open src/utils/layout/promos.ts, and then edit the the display property within the promosFromCMS array:
const promosFromCMS: Promo[] = [
  {
    id: 'my promo',
    display: 'My custom promo',
  },
]
Remove the banner
To remove the promo banner, you need to clear the contents of the promosFromCMS array. Ensure the array is empty, as shown below:
const promosFromCMS: Promo[] = []
Navbar
The main navigation bar uses a Tailwind UI Store Navigation component.
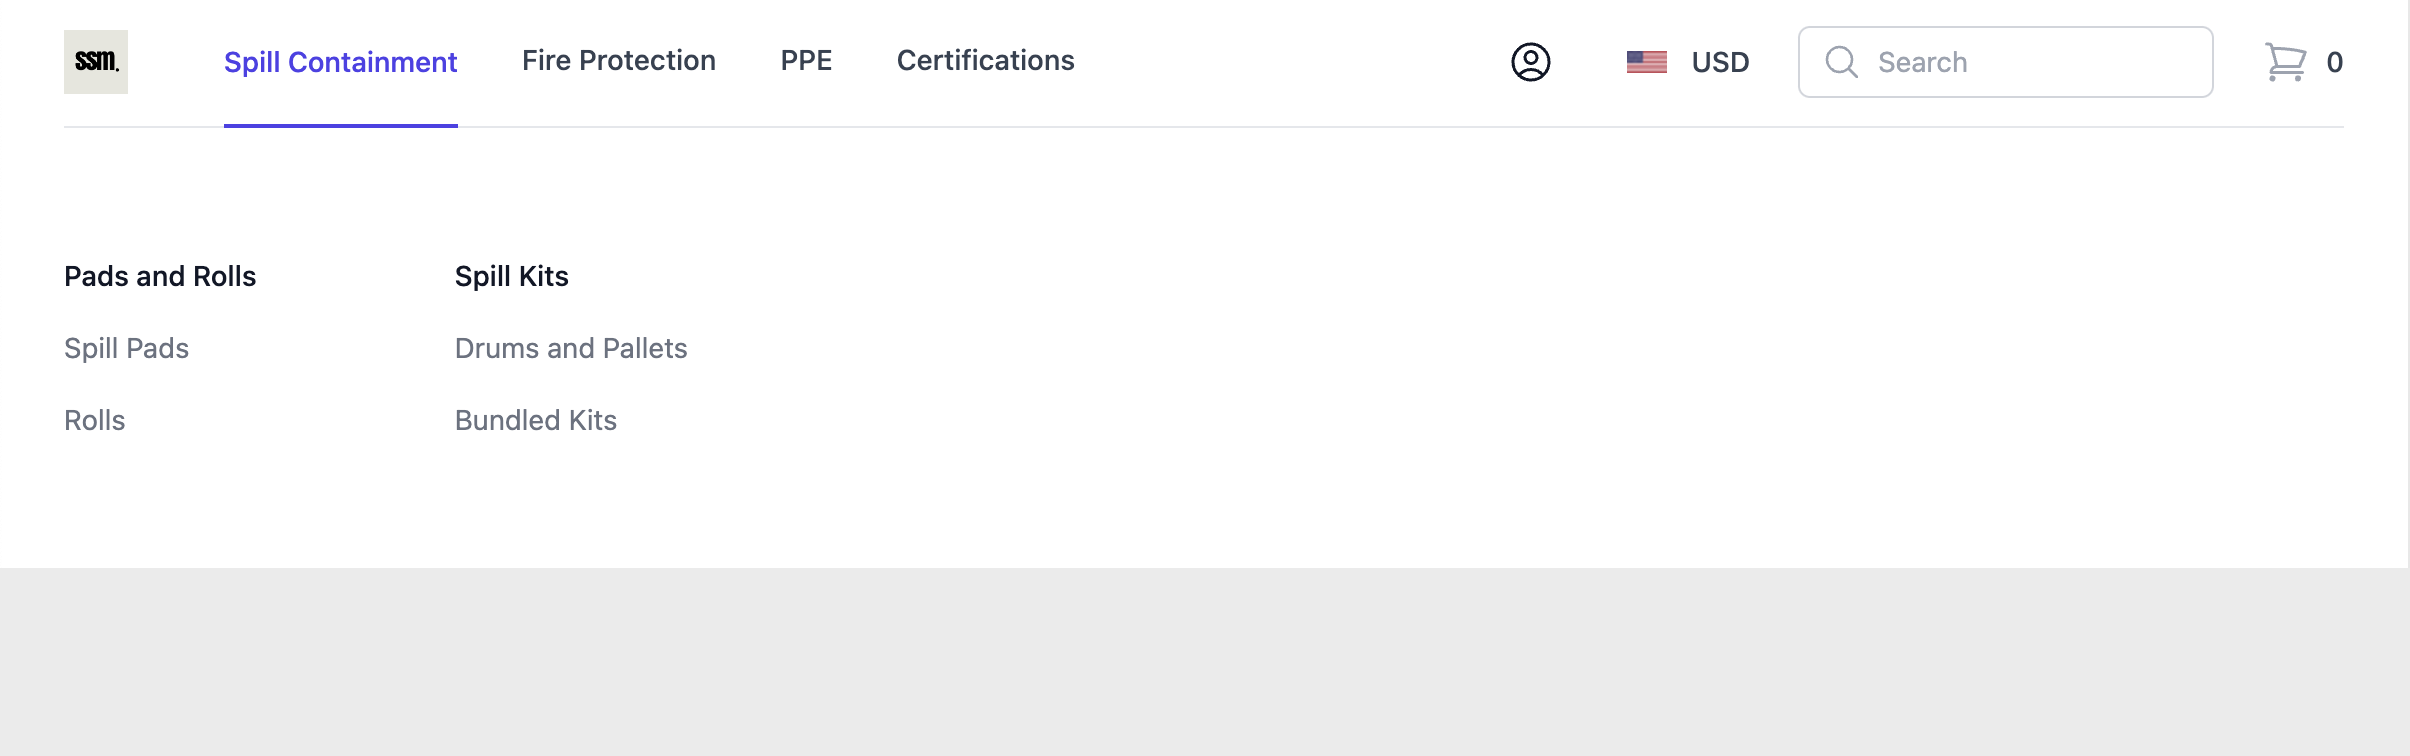
From left to right, the navbar consists of the following elements:
- Logo: The
logo.pngfile located in the/publicfolder. - Links: The navigation links are determined by the configuration of the
mainmenu. - User: Allows the current user to access their account or displays "Sign In | Register" links for guests.
- Currency: The available currencies depend on those defined in the
currencyListin yourmpconfig.tsfile. - Search: Initiates a product search query when a term is entered.
- Cart: Opens the shopping cart for the current user.
The src/components/Navigation folder contains the files that generate the navbar component and links.
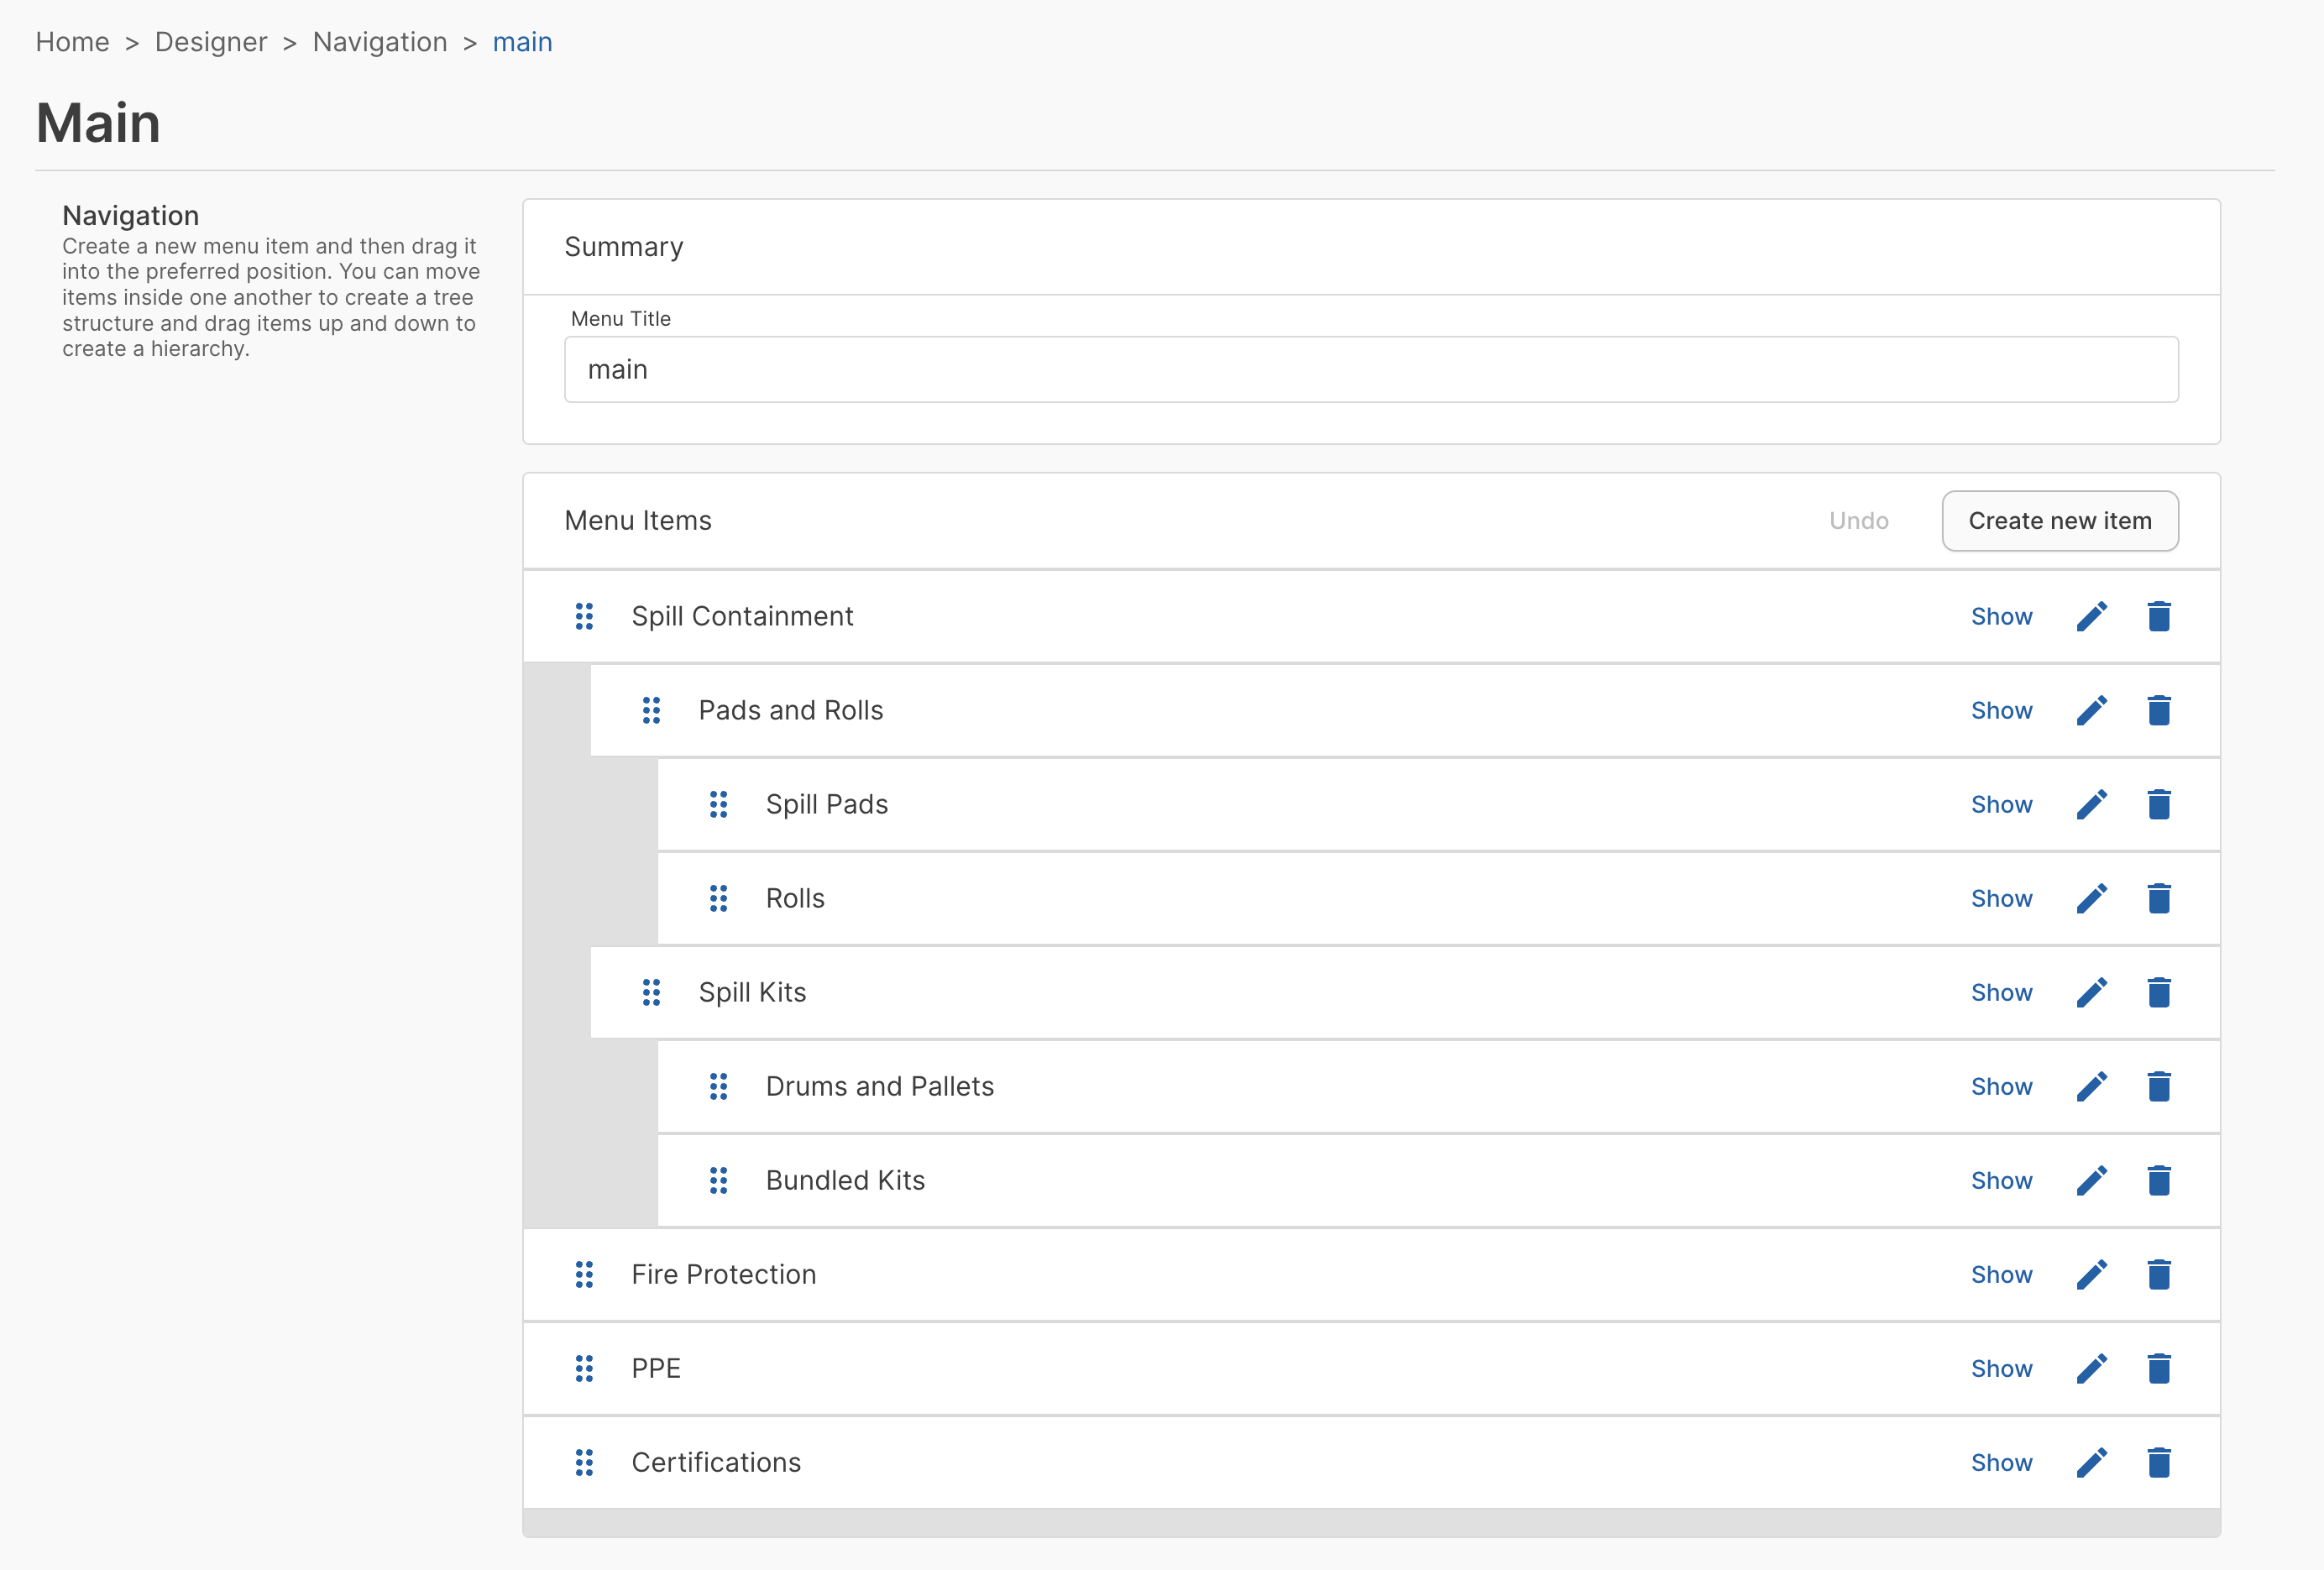
Update navbar links
The navigation links are fetched from the API. The menu with the main slug populates the navbar links.
To customize these links, you can use the Nautical Dashboard. Go to Storefront -> Navigation and create or modify the main menu. Any changes will be reflected in the storefront.
If you want to create a dropdown within the navigation bar, simply nest menu items under the desired parent item. These nested items will remain hidden in the storefront until the user expands the parent menu item.
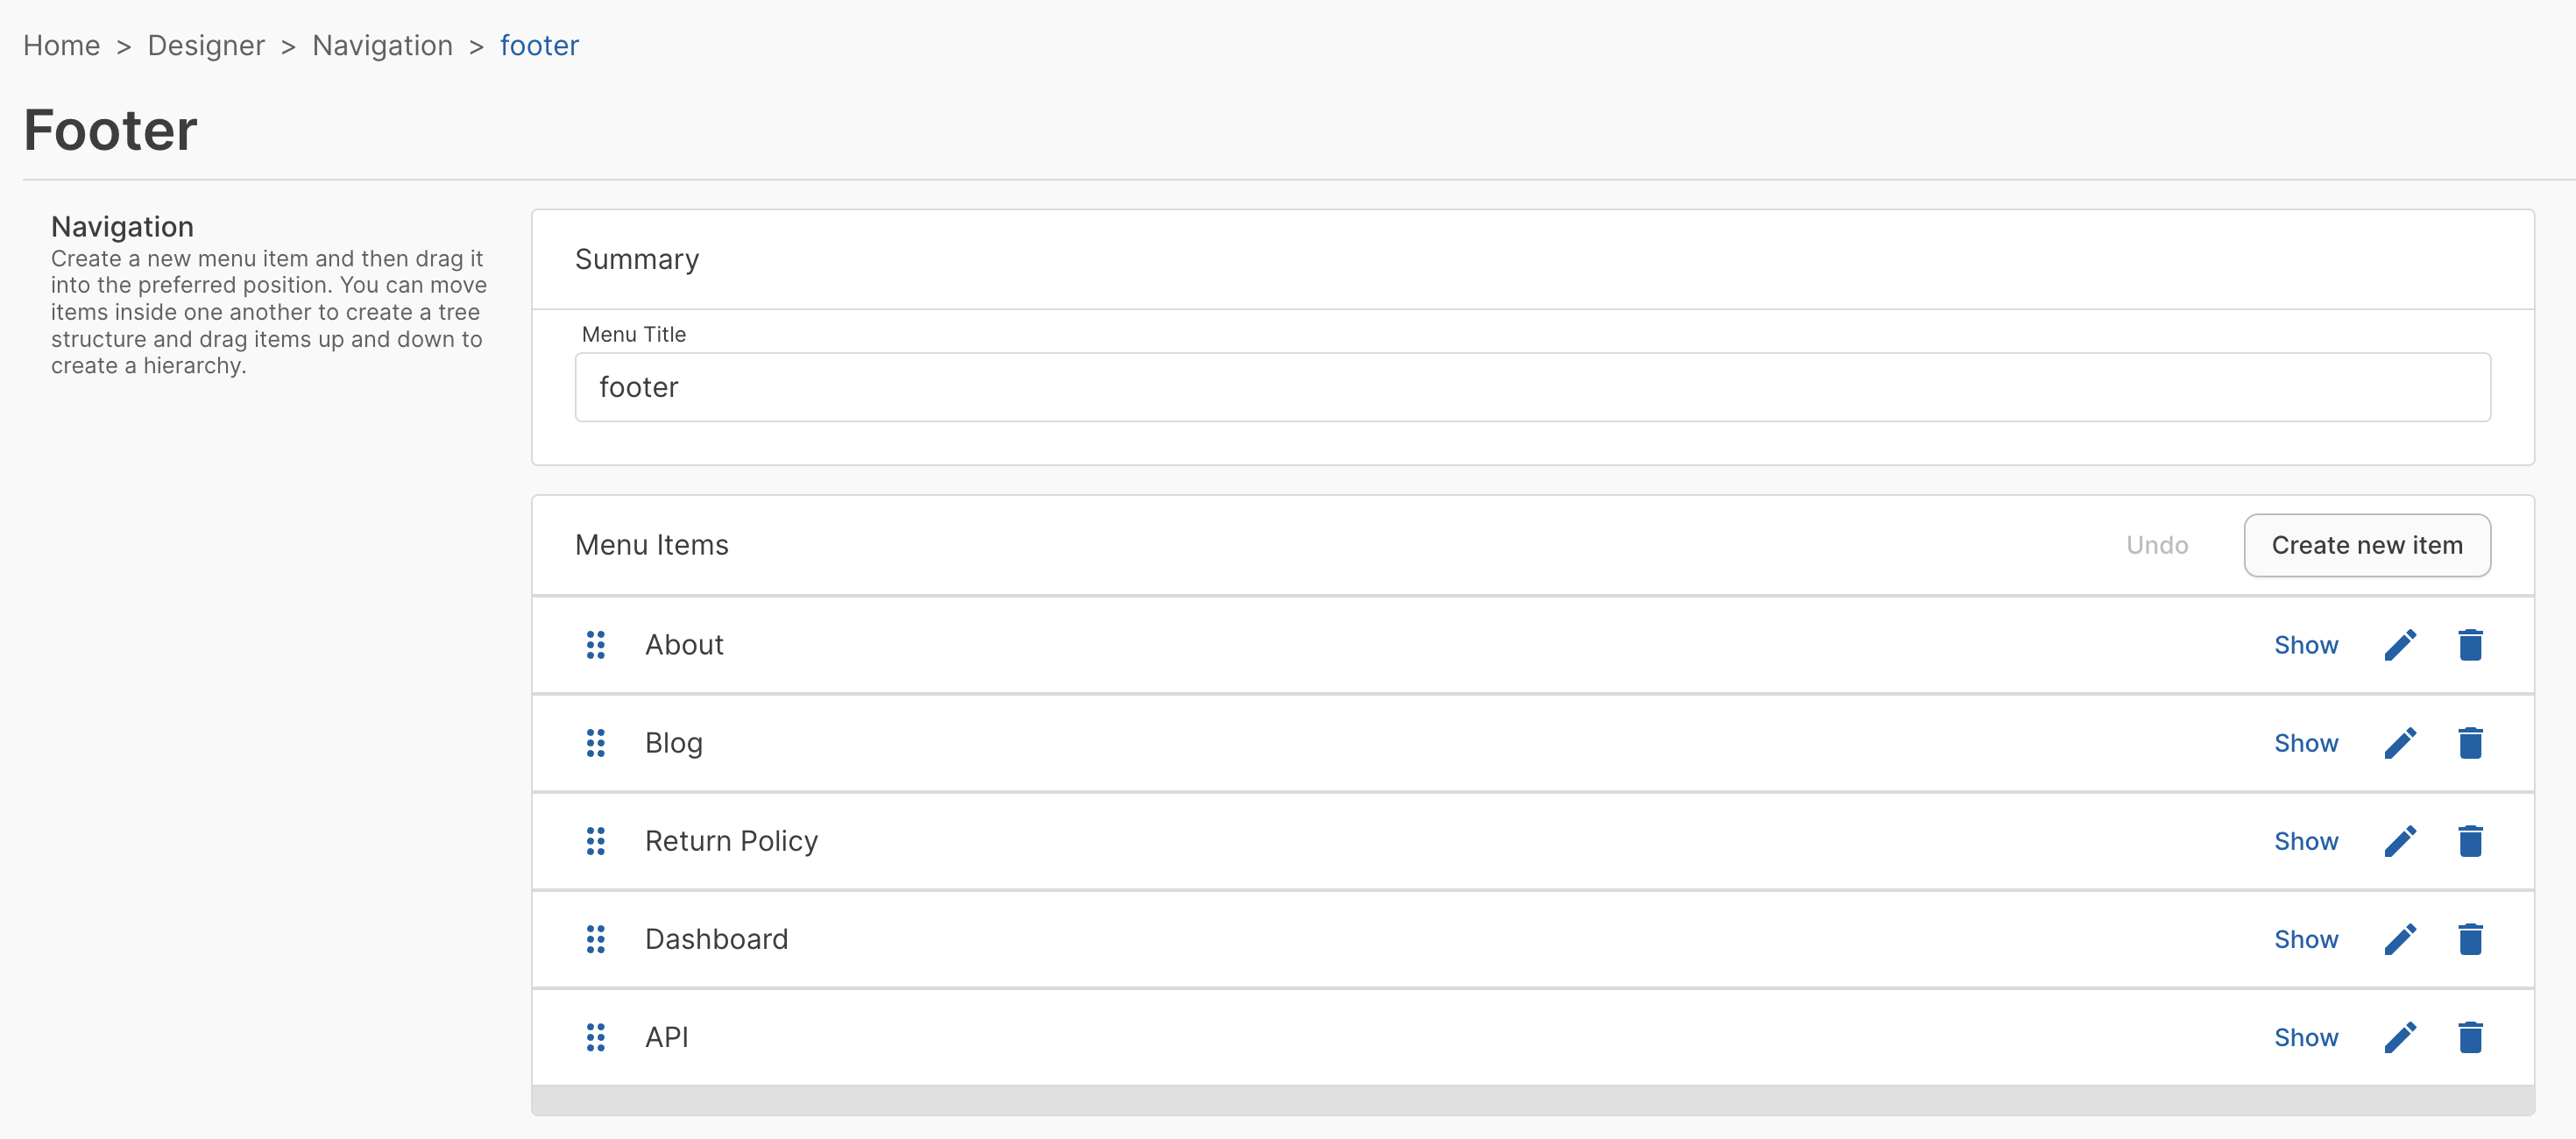
Footer
The footer uses a Tailwind UI Footer component. The footer appears at the bottom of each page.

To change the footer, some updates are pulled in from the API and can be done with the Dashboard, and others must be made in the reference storefront codebase directly.
Update footer links
The footer's navigation links are fetched from the API. The menu with the footer slug populates the footer links. The logic for generating link paths is in /src/components/Layout/Footer/FooterNavItem.tsx.
To customize these links, you can use the Nautical Dashboard. Go to Storefront -> Navigation and create or modify the footer menu. Any changes will be reflected in the storefront.
Update footer social media
To edit the social media links, open Footer.tsx in /src/components/Layout/Footer/ and edit the data inside the social array.
Change the href attributes in the social array to link to your company's social media pages.
const social = [
  {
    name: 'Facebook',
    href: 'https://www.facebook.com/nauticalcommerce',
    icon: () => (
      <svg
        fill="currentColor"
        viewBox="0 0 24 24"
        className="h-6 w-6"
        aria-hidden="true"
      >
        <path
          fillRule="evenodd"
          d="M22 12c0-5.523-4.477-10-10-10S2 6.477 2 12c0 4.991 3.657 9.128 8.438 9.878v-6.987h-2.54V12h2.54V9.797c0-2.506 1.492-3.89 3.777-3.89 1.094 0 2.238.195 2.238.195v2.46h-1.26c-1.243 0-1.63.771-1.63 1.562V12h2.773l-.443 2.89h-2.33v6.988C18.343 21.128 22 16.991 22 12z"
          clipRule="evenodd"
        />
      </svg>
    ),
  },
  {
    name: 'Instagram',
    href: 'https://www.instagram.com/nauticalcommerce/',
    icon: () => (
      <svg
        fill="currentColor"
        viewBox="0 0 24 24"
        className="h-6 w-6"
        aria-hidden="true"
      >
        <path
          fillRule="evenodd"
          d="M12.315 2c2.43 0 2.784.013 3.808.06 1.064.049 1.791.218 2.427.465a4.902 4.902 0 011.772 1.153 4.902 4.902 0 011.153 1.772c.247.636.416 1.363.465 2.427.048 1.067.06 1.407.06 4.123v.08c0 2.643-.012 2.987-.06 4.043-.049 1.064-.218 1.791-.465 2.427a4.902 4.902 0 01-1.153 1.772 4.902 4.902 0 01-1.772 1.153c-.636.247-1.363.416-2.427.465-1.067.048-1.407.06-4.123.06h-.08c-2.643 0-2.987-.012-4.043-.06-1.064-.049-1.791-.218-2.427-.465a4.902 4.902 0 01-1.772-1.153 4.902 4.902 0 01-1.153-1.772c-.247-.636-.416-1.363-.465-2.427-.047-1.024-.06-1.379-.06-3.808v-.63c0-2.43.013-2.784.06-3.808.049-1.064.218-1.791.465-2.427a4.902 4.902 0 011.153-1.772A4.902 4.902 0 015.45 2.525c.636-.247 1.363-.416 2.427-.465C8.901 2.013 9.256 2 11.685 2h.63zm-.081 1.802h-.468c-2.456 0-2.784.011-3.807.058-.975.045-1.504.207-1.857.344-.467.182-.8.398-1.15.748-.35.35-.566.683-.748 1.15-.137.353-.3.882-.344 1.857-.047 1.023-.058 1.351-.058 3.807v.468c0 2.456.011 2.784.058 3.807.045.975.207 1.504.344 1.857.182.466.399.8.748 1.15.35.35.683.566 1.15.748.353.137.882.3 1.857.344 1.054.048 1.37.058 4.041.058h.08c2.597 0 2.917-.01 3.96-.058.976-.045 1.505-.207 1.858-.344.466-.182.8-.398 1.15-.748.35-.35.566-.683.748-1.15.137-.353.3-.882.344-1.857.048-1.055.058-1.37.058-4.041v-.08c0-2.597-.01-2.917-.058-3.96-.045-.976-.207-1.505-.344-1.858a3.097 3.097 0 00-.748-1.15 3.098 3.098 0 00-1.15-.748c-.353-.137-.882-.3-1.857-.344-1.023-.047-1.351-.058-3.807-.058zM12 6.865a5.135 5.135 0 110 10.27 5.135 5.135 0 010-10.27zm0 1.802a3.333 3.333 0 100 6.666 3.333 3.333 0 000-6.666zm5.338-3.205a1.2 1.2 0 110 2.4 1.2 1.2 0 010-2.4z"
          clipRule="evenodd"
        />
      </svg>
    ),
  },
  {
    name: 'X',
    href: 'https://x.com/nauticalcom',
    icon: () => (
      <svg
        fill="currentColor"
        viewBox="0 0 24 24"
        className="h-6 w-6"
        aria-hidden="true"
      >
        <path d="M8.29 20.251c7.547 0 11.675-6.253 11.675-11.675 0-.178 0-.355-.012-.53A8.348 8.348 0 0022 5.92a8.19 8.19 0 01-2.357.646 4.118 4.118 0 001.804-2.27 8.224 8.224 0 01-2.605.996 4.107 4.107 0 00-6.993 3.743 11.65 11.65 0 01-8.457-4.287 4.106 4.106 0 001.27 5.477A4.072 4.072 0 012.8 9.713v.052a4.105 4.105 0 003.292 4.022 4.095 4.095 0 01-1.853.07 4.108 4.108 0 003.834 2.85A8.233 8.233 0 012 18.407a11.616 11.616 0 006.29 1.84" />
      </svg>
    ),
  },
  {
    name: 'YouTube',
    href: 'https://www.youtube.com/channel/UCEWm0Ver0CEO5-V_fT8FK4w',
    icon: () => (
      <svg
        fill="currentColor"
        viewBox="0 0 24 24"
        className="h-6 w-6"
        aria-hidden="true"
      >
        <path
          fillRule="evenodd"
          d="M19.812 5.418c.861.23 1.538.907 1.768 1.768C21.998 8.746 22 12 22 12s0 3.255-.418 4.814a2.504 2.504 0 0 1-1.768 1.768c-1.56.419-7.814.419-7.814.419s-6.255 0-7.814-.419a2.505 2.505 0 0 1-1.768-1.768C2 15.255 2 12 2 12s0-3.255.417-4.814a2.507 2.507 0 0 1 1.768-1.768C5.744 5 11.998 5 11.998 5s6.255 0 7.814.418ZM15.194 12 10 15V9l5.194 3Z"
          clipRule="evenodd"
        />
      </svg>
    ),
  },
]
Update footer copyright
Update the copyright to your company name and the current year. Open Footer.tsx in /src/components/Layout/Footer/ and edit the following line:
export const Footer: FC<FooterProps> = ({ links }) => {
return (
<footer className="bg-white">
<div className="mx-auto max-w-7xl overflow-hidden px-6 py-20 sm:py-24 lg:px-8">
{. . . }
<p className="mt-10 text-center text-xs leading-5 text-gray-500">
© 2020 Your Company. All rights reserved.
</p>
</div>
</footer>
)
}
Error pages
Error pages are built with a custom 404 Page Tailwind UI component.

Each error page has support, status, and X(Twitter) links that should be updated. This includes the following pages:
- 404 page located at
/src/pages/404.tsx - 500 page located at
/src/pages/500.tsx - Error page located at
/src/pages/_error.tsx
In each of the above files, update each Link to replace the hash (#) with your company link:
<nav className="mx-auto flex w-full max-w-7xl items-center gap-x-4 px-6 text-sm leading-7 text-gray-600 lg:px-8">
  <Link href="#">Contact support</Link>
  <svg
    viewBox="0 0 2 2"
    aria-hidden="true"
    className="h-0.5 w-0.5 fill-gray-300"
  >
    <circle cx={1} cy={1} r={1} />
  </svg>
  <Link href="#">Status</Link>
  <svg
    viewBox="0 0 2 2"
    aria-hidden="true"
    className="h-0.5 w-0.5 fill-gray-300"
  >
    <circle cx={1} cy={1} r={1} />
  </svg>
  <Link href="#">X</Link>
</nav>
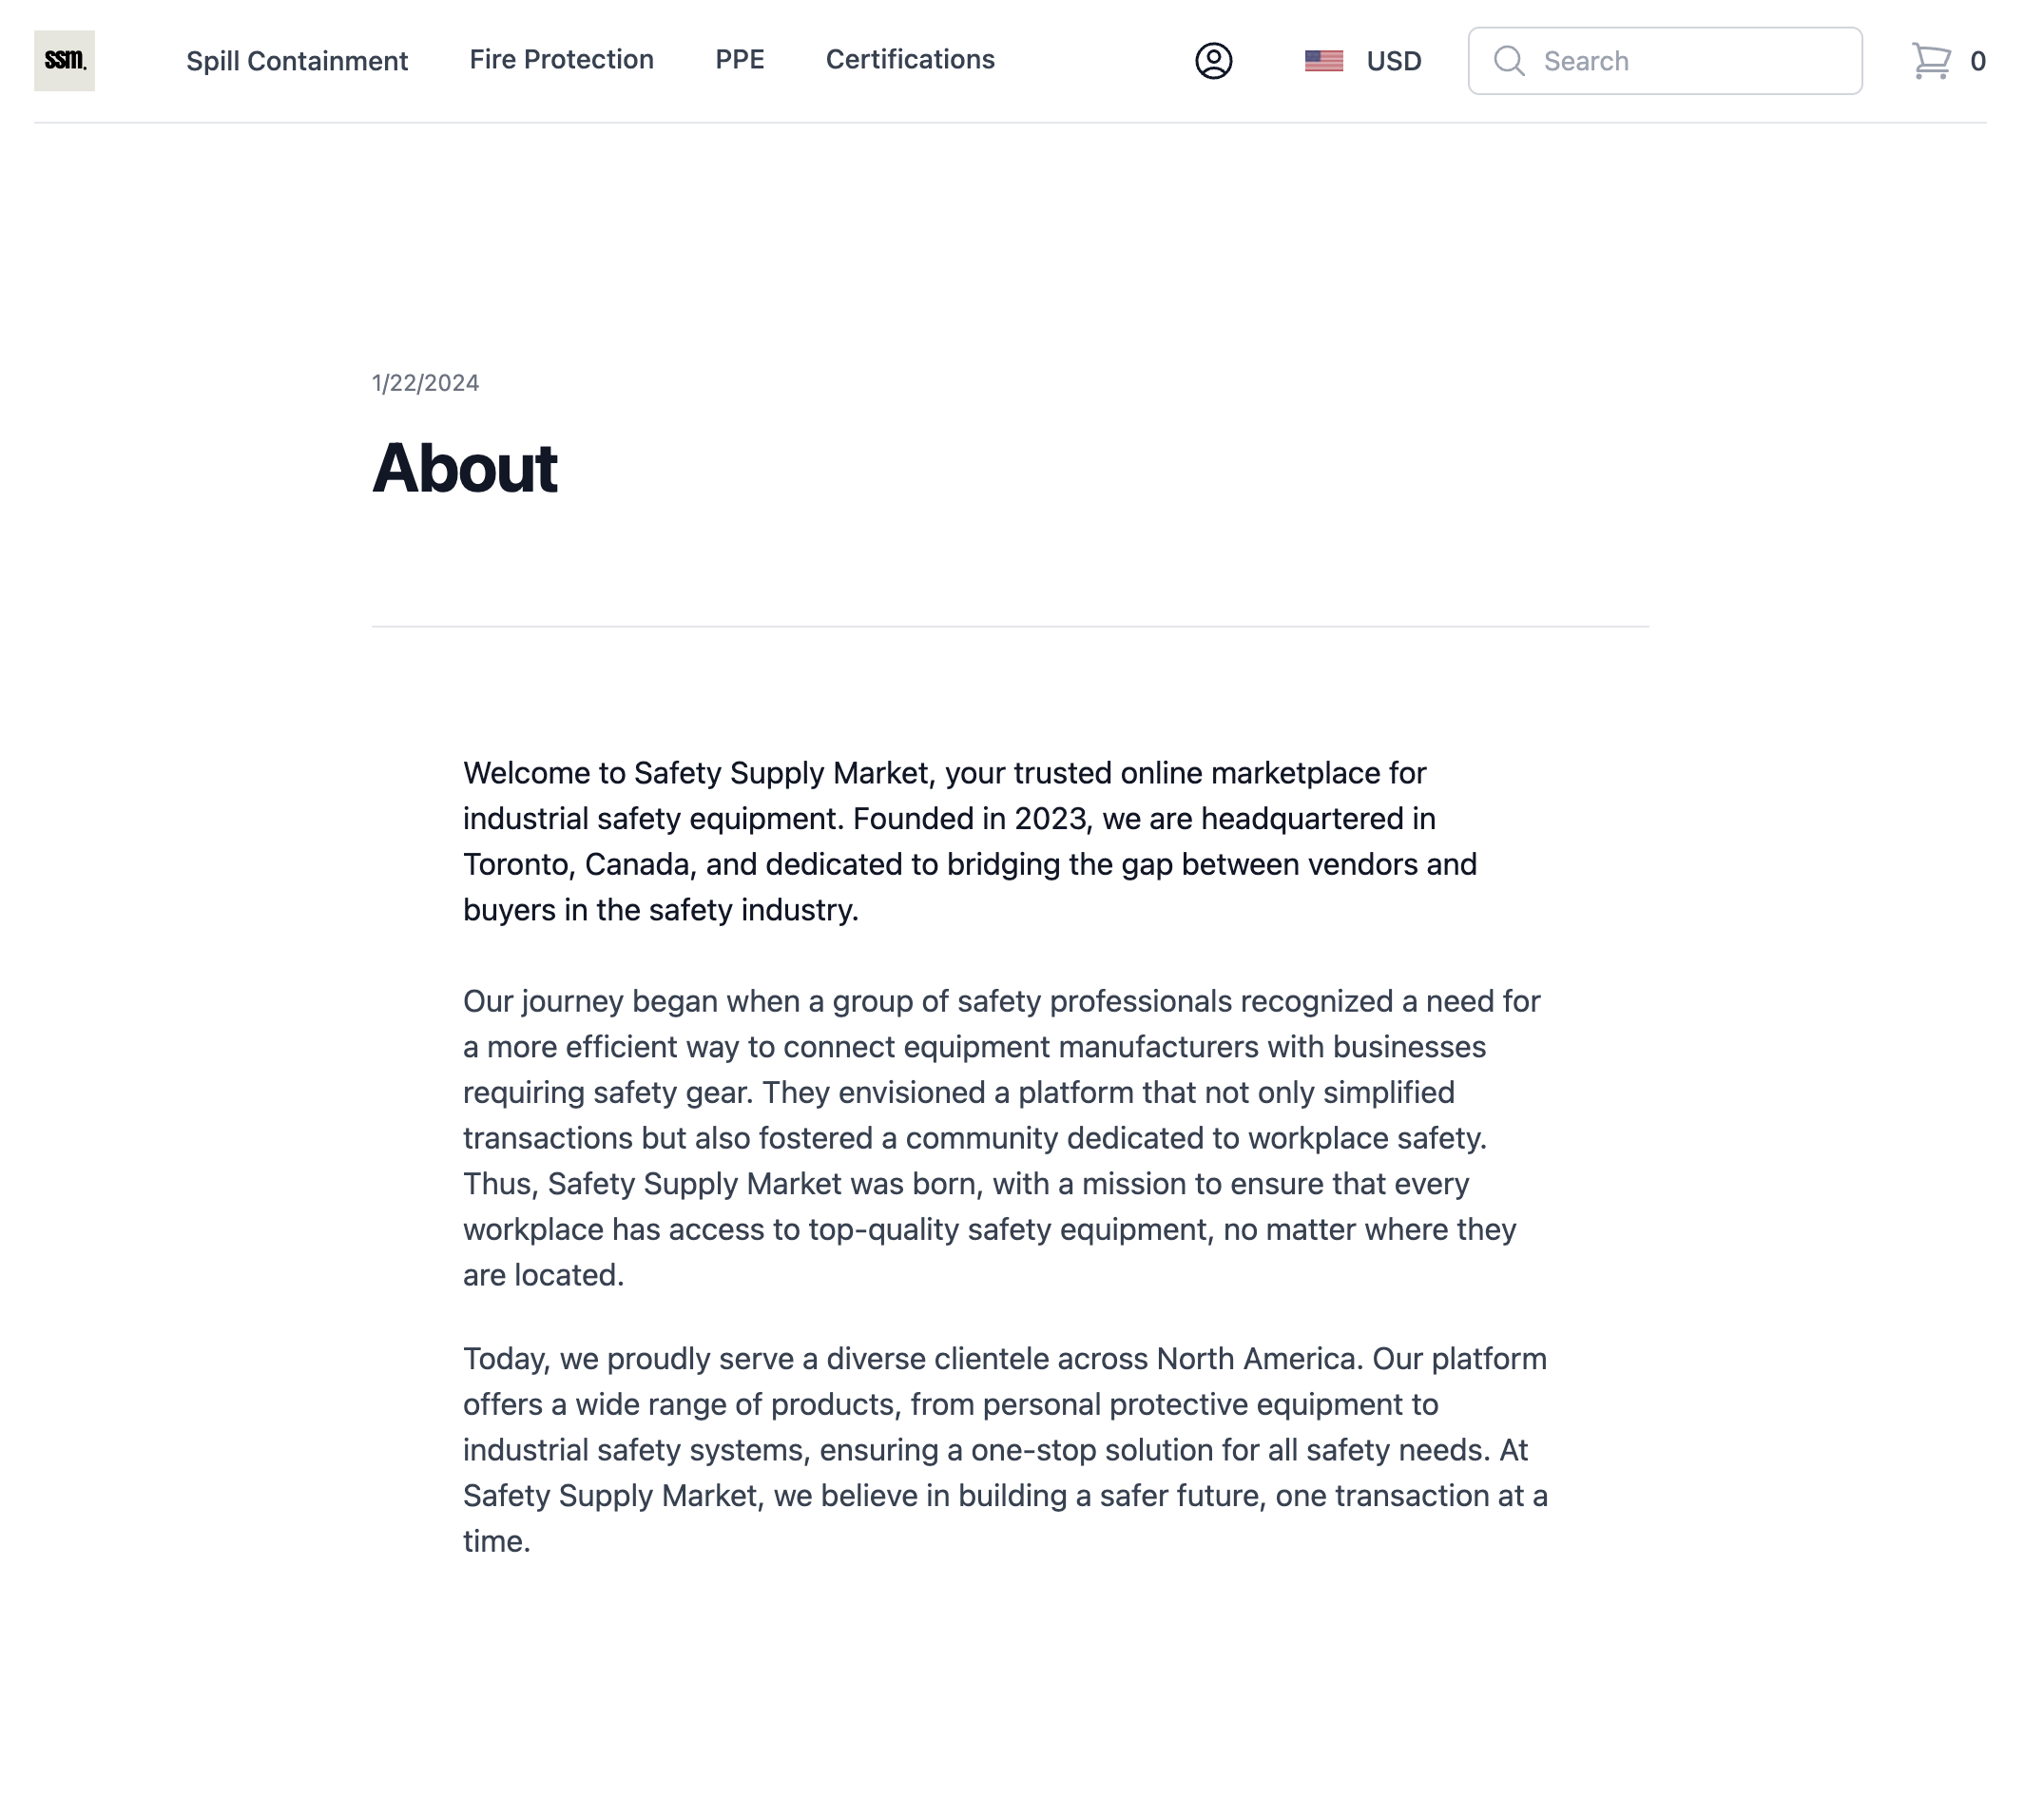
Custom pages (blog)
Custom pages are fetched from the API and routed to blog entries.
Blog index
The blog index page uses the Tailwind UI Blog section component.
To customize the layout and content on the blog index, edit /src/pages/blog/index.tsx.
Add pages
To customize the layout and content of individual blog pages, edit /src/pages/blog/[slug].tsx.
You can add new pages from the Dashboard by going to Storefront -> Pages:
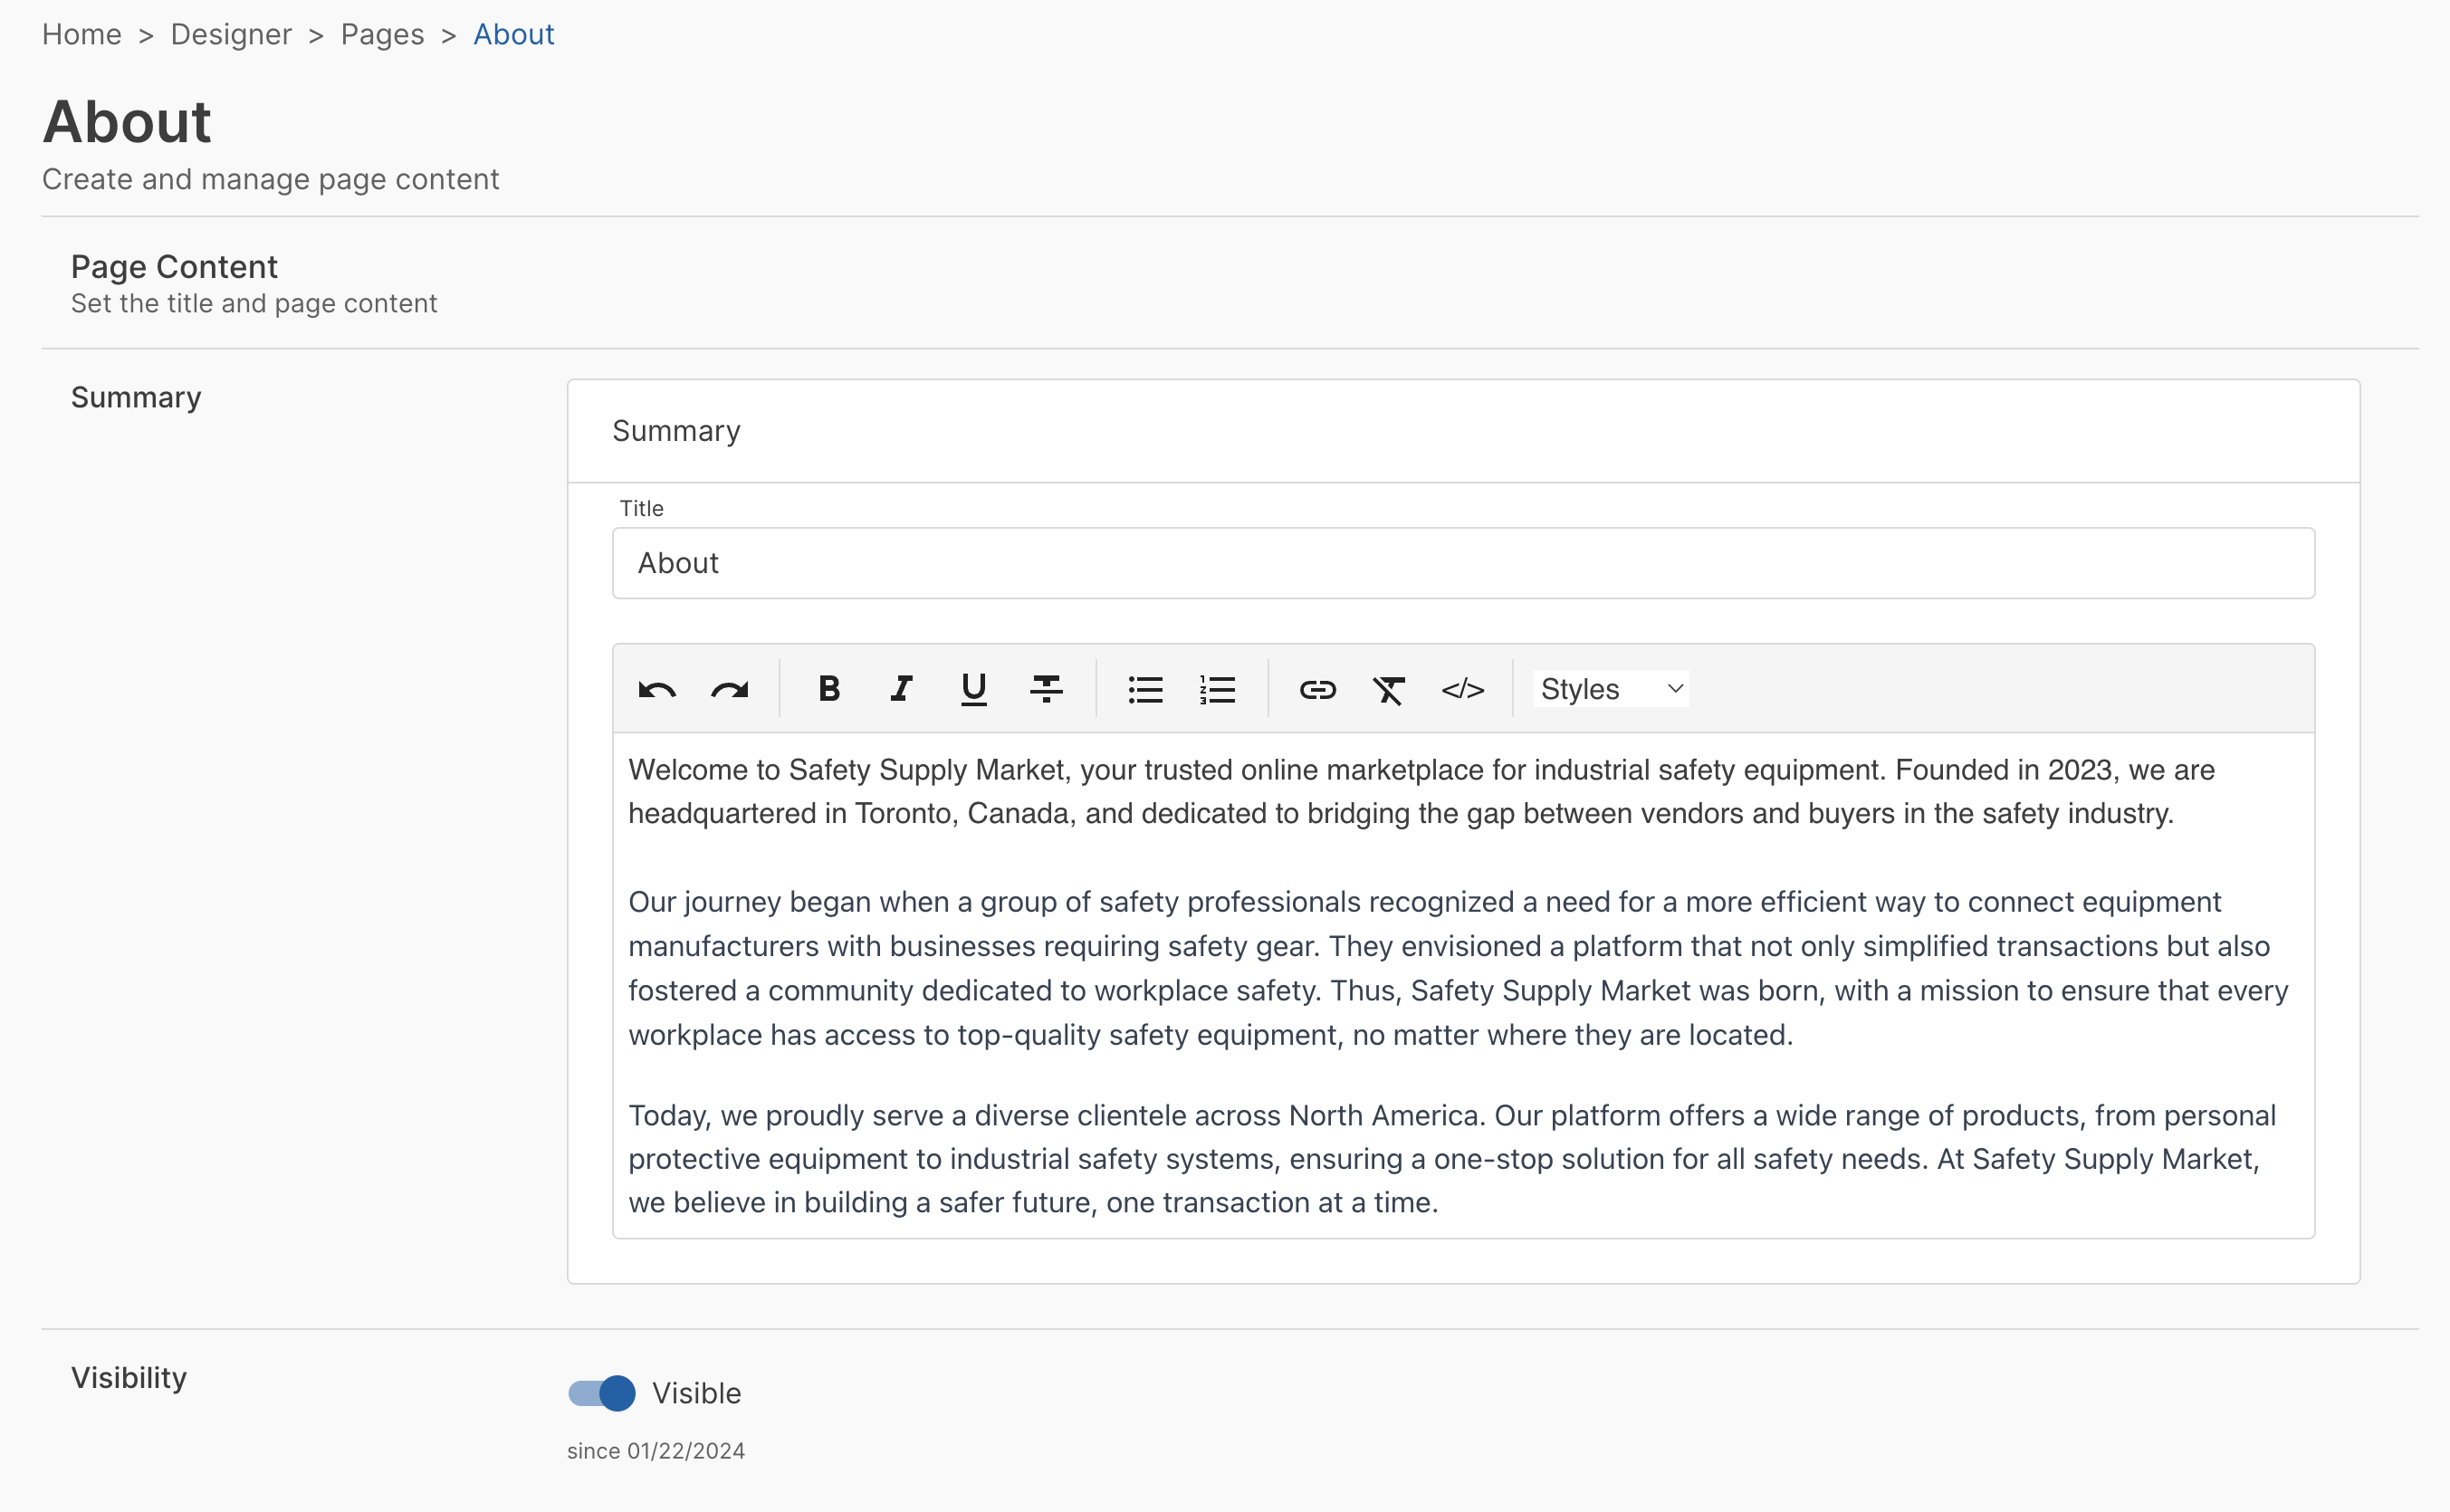
Once published, the page will be accessible from your storefront by going to /blog/{page-slug}:
Home page
You can customize your home page by editing /src/pages/index.tsx.
The following sections describe how to customize the home page components that are added out of the box with a new reference storefront.
Hero banner
The hero banner is a two-column layout with a title, description, action button, and photo.

To edit the hero banner, open /src/pages/index.tsx and edit the HeroBanner component props:
<HeroBanner
    title="Safety Supply Marketplace"
    description={`Your premier destination for all safety and protection needs. Specializing in a wide range of products from spill containment solutions to personal protective equipment, our marketplace is dedicated to providing top-quality safety supplies.`}
    action={{
        title: 'Browse products',
        url: '/products',
    }}
    image={{
        url: '/images/safety-equipment.png',
        alt: 'Safety equipment',
    }}
/>
Offers
The offers section is a 3-column layout that appears at the top of the home page. Each offer has a name, description, and a link.

To edit the offers, open /src/pages/index.tsx and edit the data in the offers array:
const offers = [
  {
    name: 'Start selling',
    description: 'Register as a seller today',
    href: '#',
  },
  {
    name: "Return when you're ready",
    description: '60 days of free returns',
    href: '#',
  },
  {
    name: 'Sign up for our newsletter',
    description: '15% off your first order',
    href: '#',
  },
]
Featured collections
There are two featured collections sections on the home page. Both are populated using conditional logic to find collections with the API.
-
Trending products: The "Trending products" section on the home page pulls in products from the featured collection.
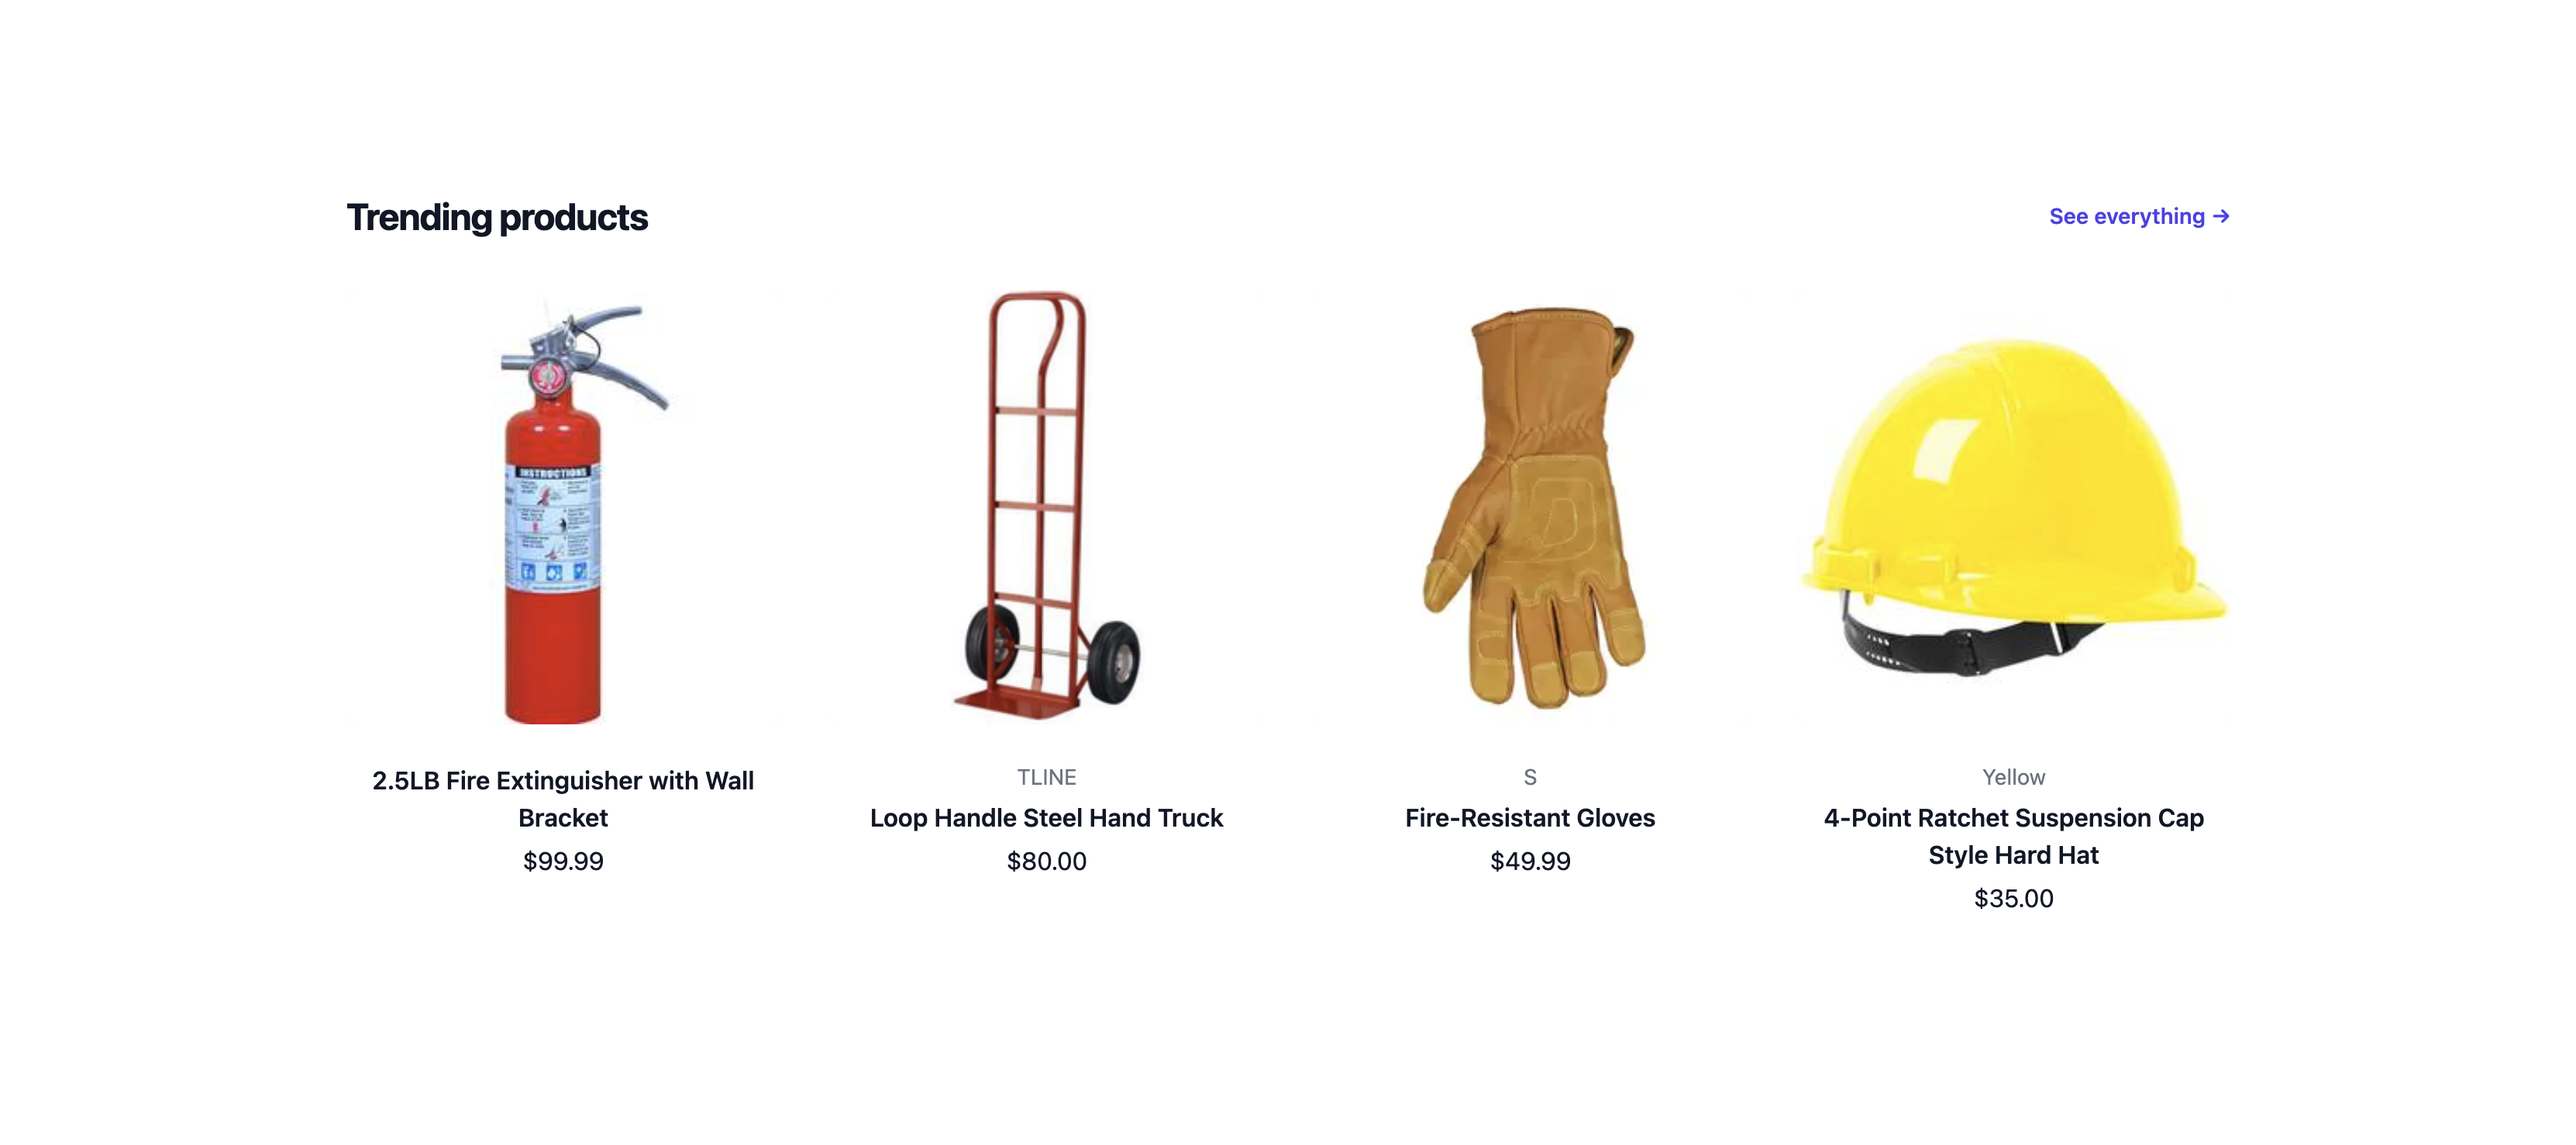
-
Collections: Up to three other collections can be featured in the "Collections" section on the home page. These are the most recent three collections published with metadata
“type”: “featured”.
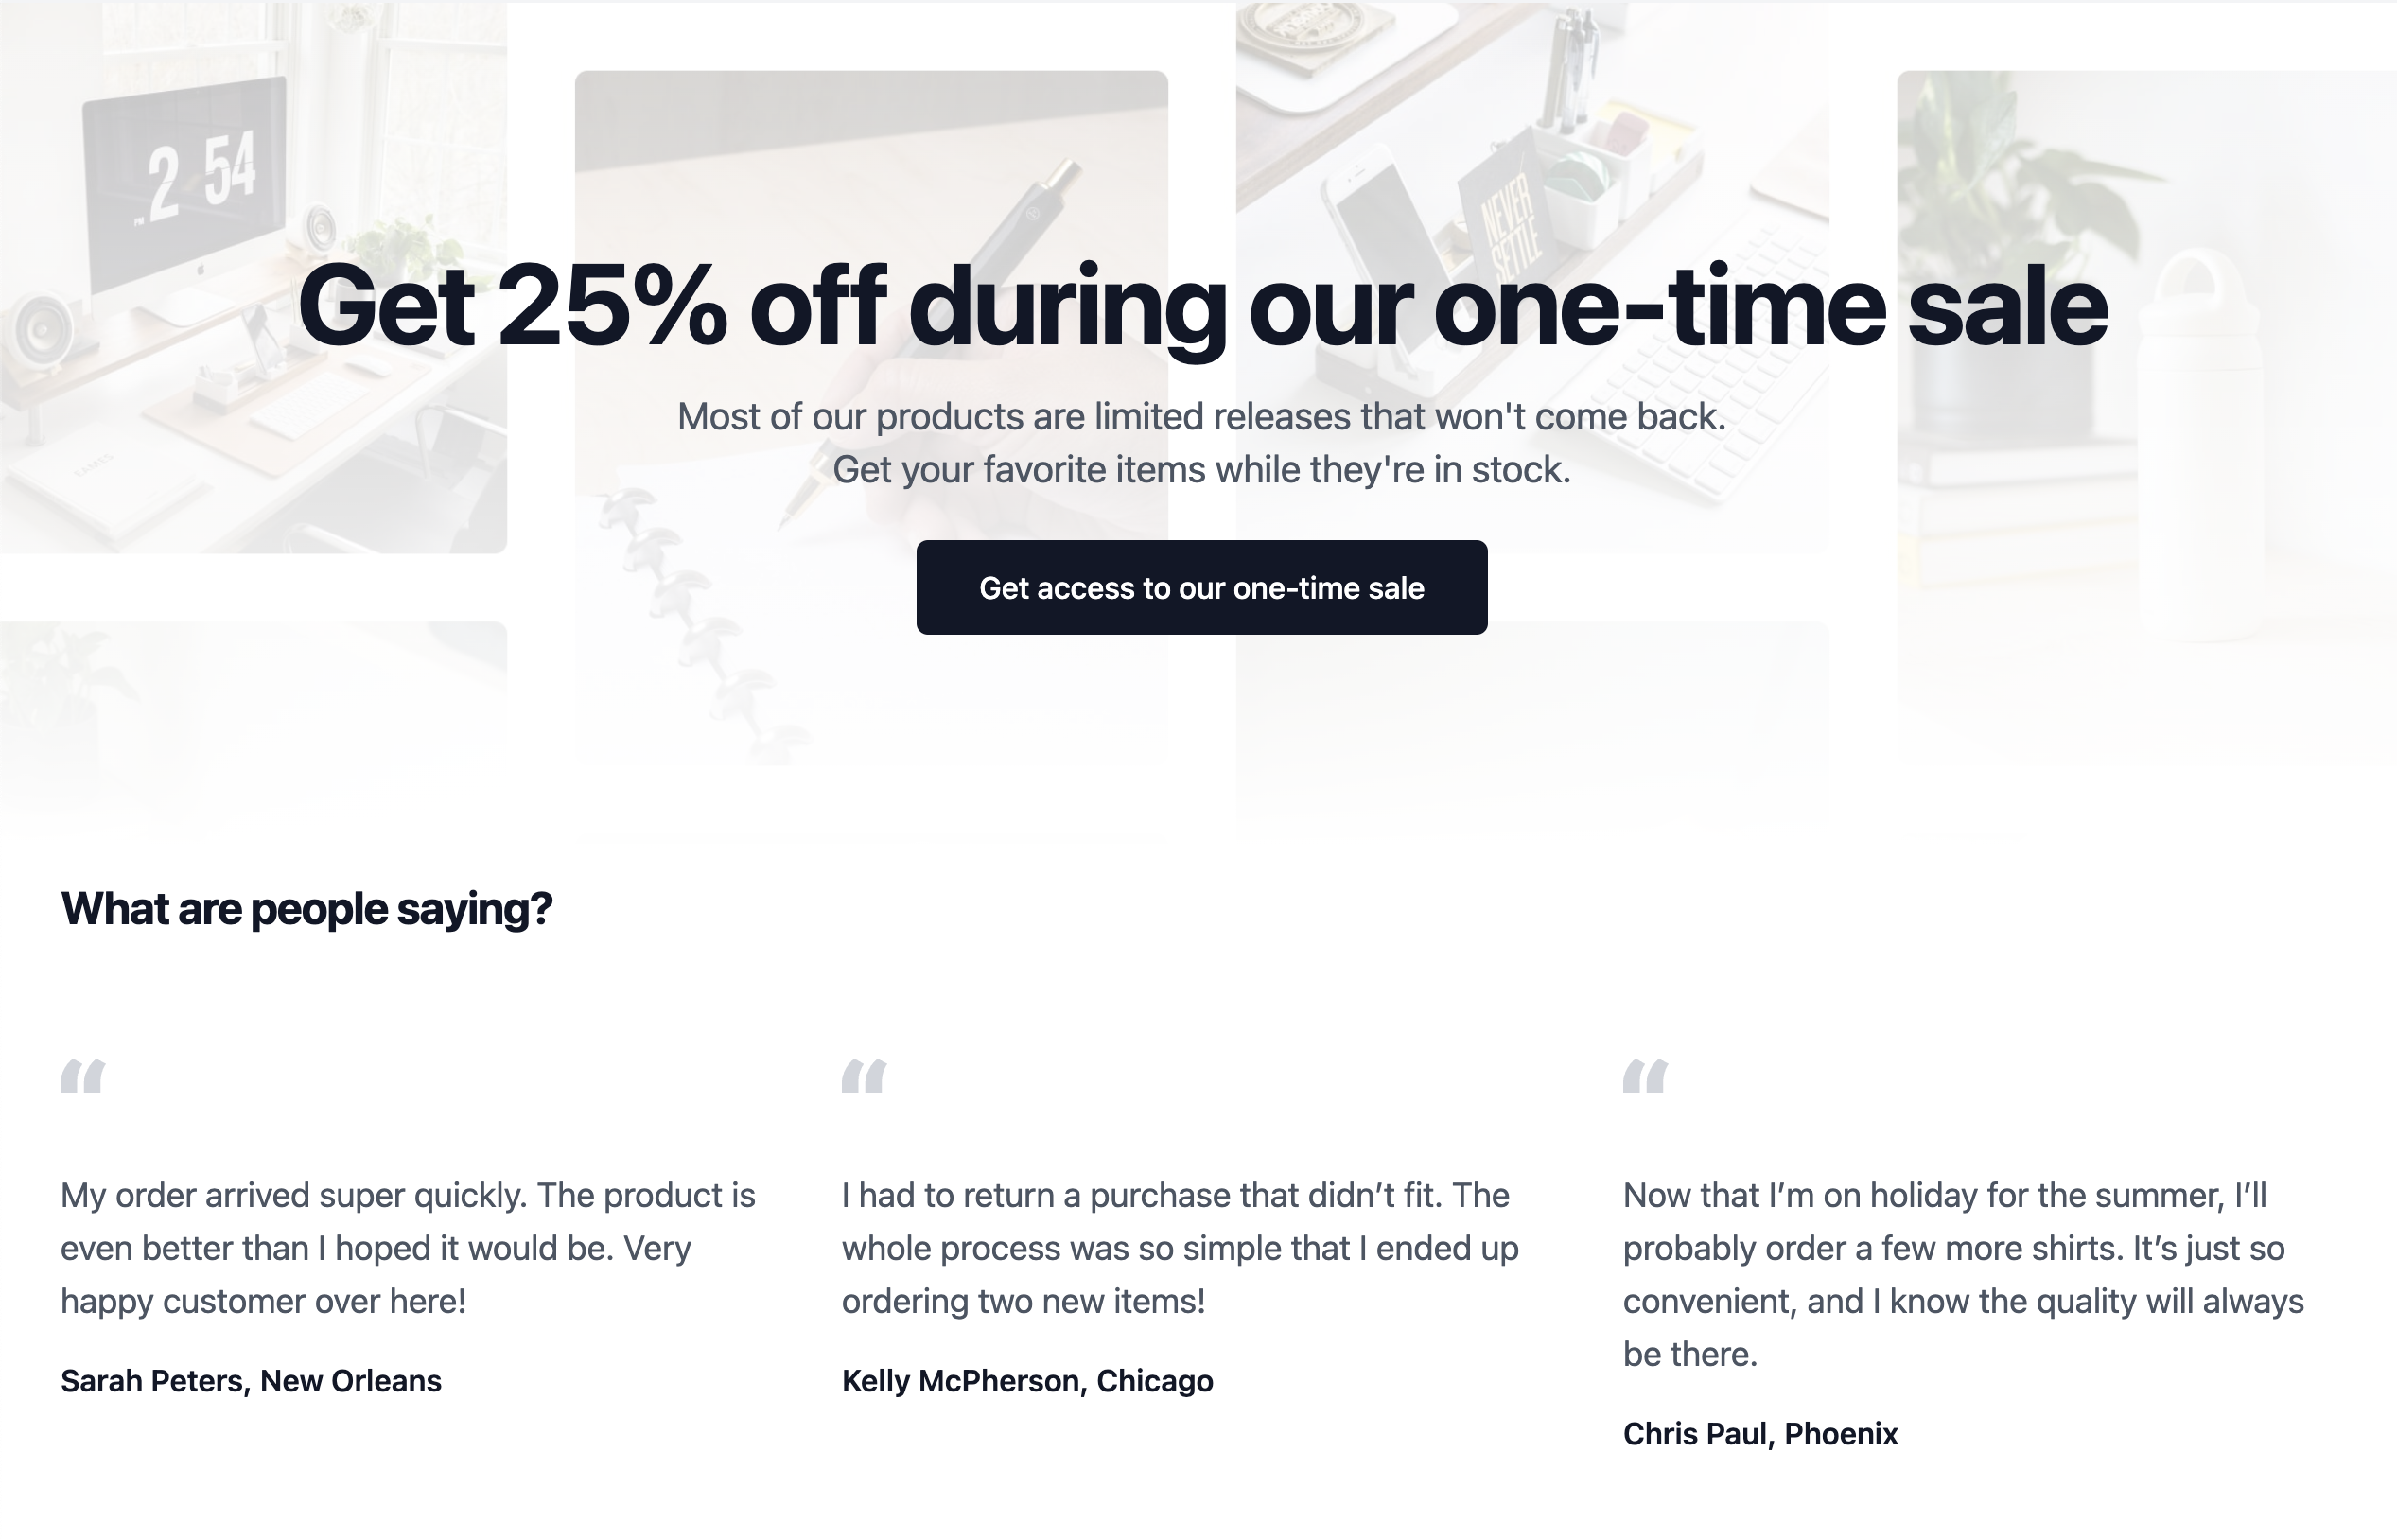
Promo and testimonials
The testimonials section on the home page is powered by the Tailwind UI Promo section component.
Update the featured image
To change or remove the background image, replace the image in the Image component in /src/pages/index.tsx. You can store images in the /public/images folder.
<div className="absolute inset-0 mx-auto max-w-7xl overflow-hidden xl:px-8">
    <Image
    src="https://tailwindui.com/img/ecommerce-images/home-page-02-sale-full-width.jpg"
    alt=""
    className="h-full w-full object-cover object-center"
    />
</div>
Update the sale CTA section
You can customize the sale portion by changing the highlighted lines below in /src/pages/index.tsx. For example, you could link to a curated collection sale items or a custom page with the sale details:
<section
aria-labelledby="sale-heading"
className="relative mx-auto flex max-w-7xl flex-col items-center px-4 pt-32 text-center sm:px-6 lg:px-8"
>
<div className="mx-auto max-w-2xl lg:max-w-none">
<h2
id="sale-heading"
className="text-4xl font-bold tracking-tight text-gray-900 sm:text-5xl lg:text-6xl"
>
Get 25% off during our one-time sale
</h2>
<p className="mx-auto mt-4 max-w-xl text-xl text-gray-600">
Most of our products are limited releases that won't come back. Get your favorite items while they're in stock.
</p>
<Link
href="#"
className="mt-6 inline-block w-full rounded-md border border-transparent bg-gray-900 px-8 py-3 font-medium text-white hover:bg-gray-800 sm:w-auto"
>
Get access to our one-time sale
</Link>
</div>
</section>
Update the testimonials
To customize the testimonials, modify the data in the testimonials array in /src/pages/index.tsx:
const testimonials = [
  {
    id: 1,
    quote:
      'My order arrived super quickly. The product is even better than I hoped it would be. Very happy customer over here!',
    attribution: 'Sarah Peters, New Orleans',
  },
  {
    id: 2,
    quote:
      'I had to return a purchase that didn’t fit. The whole process was so simple that I ended up ordering two new items!',
    attribution: 'Kelly McPherson, Chicago',
  },
  {
    id: 3,
    quote:
      'Now that I’m on holiday for the summer, I’ll probably order a few more shirts. It’s just so convenient, and I know the quality will always be there.',
    attribution: 'Chris Paul, Phoenix',
  },
]
Microsites
Microsite pages are not routed to create pages in the reference storefront.
To enable microsite pages, you could follow a similar pattern used in the seller page route to add that functionality to your storefront.