Authorize.Net
Enabling Authorize.Net Integration
Go to Settings -> Apps, select "Authorize.Net" and configure the following settings:
Client Key: the client key is a public key that uniquely identifies a web service. See Client Key below.
Use sandbox: If enabled, transactions will be sent to a test environment. If disabled, transaction will be handled in a live production environment.
Store customers card: If enabled, Authorize.Net is instructed to store customer card details.
Automatic payment capture: If enabled, Nautical will automatically capture funds. If disabled, the funds are blocked but need to be captured manually.
Supported currencies: your currency as an ISO 4217 3-letter code (eg.
USD,EUR,GBP)API Login ID: is a unique piece of information specifically associated with your payment gateway account. Do not share these and store them securely. It's recommended to rotate the keys regularly to further strengthen the security of your account. To get your API Login, see Authorize.Net docs
Transaction Key: the transaction key is used along with the API Login to authenticate requests. To get your key, see Authorize.Net docs
Authorize.Net testing guide and Test Cards. Test credit card numbers will only work in the sandbox.
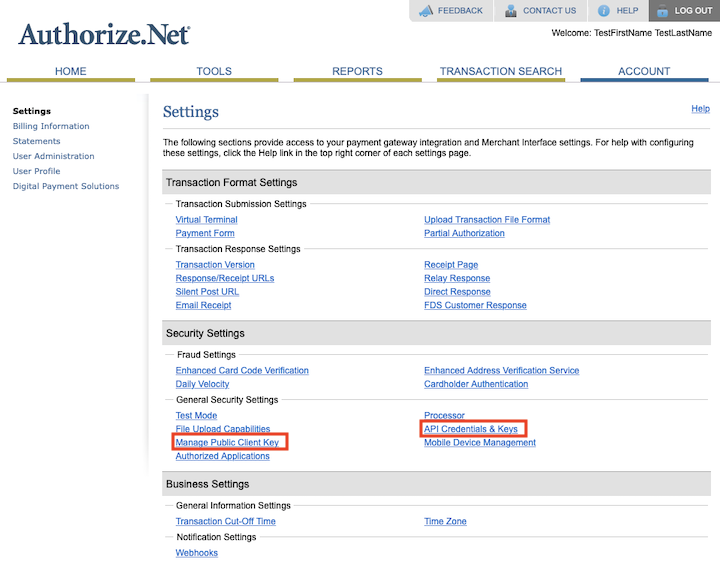
Find Your API & Client Key
Login to your Authorize.Net account
Go to the Account tab
Under Settings > Security Settings you'll find, API Credentials & Keys and Manage Public Client Key