Connect to Shopify
The Shopify plugin is currently feature flagged. Learn more here.
The Shopify plugin allows individual sellers to connect their Shopify store to any Nautical-powered marketplace. This article explains how to activate the integration, and how data flows between the two systems.
Key benefits
The Shopify integration provides the following key benefits:
-
Seller configuration: Each seller can configure their own integration for their Shopify store and choose which data is synchronized.
-
Seamless product listing: Sellers can sign up and import their Shopify products without the need to separately manage their product catalog on your marketplace.
-
Flexible pricing: You can choose to enable price sync to keep product prices in Shopify synced to Nautical, or keep the pricing strategy separate between the two systems.
-
Data syncing: Shopify serves as the source for inventory and product information, ensuring that all imported products are up-to-date and accurately reflected in the marketplace.
-
Fulfill orders from Shopify: Sellers can continue to use Shopify as their primary OMS for orders placed on a Nautical marketplace. With order sync, order cancellations and fulfillments from Shopify will be synchronized back to Nautical.
Before you connect Shopify to Nautical, consider how much control you need over your product taxonomy. Product templates and attributes are created automatically from Shopify, and these likely will not be standardized across the other sellers on your platform.
Allowing sellers to connect to Shopify
As a marketplace operator, to allow your sellers to connect to their Shopify stores you must configure the following:
- Ensure that the seller staff members who will be configuring the plugin have the necessary permissions:
- Manage apps
- Manage plugins
- Enable the Allow seller configurations? setting in the Nautical app for Shopify. This allows sellers to access and configure the plugin for their Shopify store.
Connect a Shopify store
The following sections explain how to connect to a Shopify store and import your product catalog as a seller on a Nautical-powered marketplace.
Step 1: Create an app in Shopify
You'll first need to create a custom app in your Shopify account in order to grant Nautical access to your product catalog and other store information.
Follow the instructions in the Shopify Help Center to create and install a custom app.
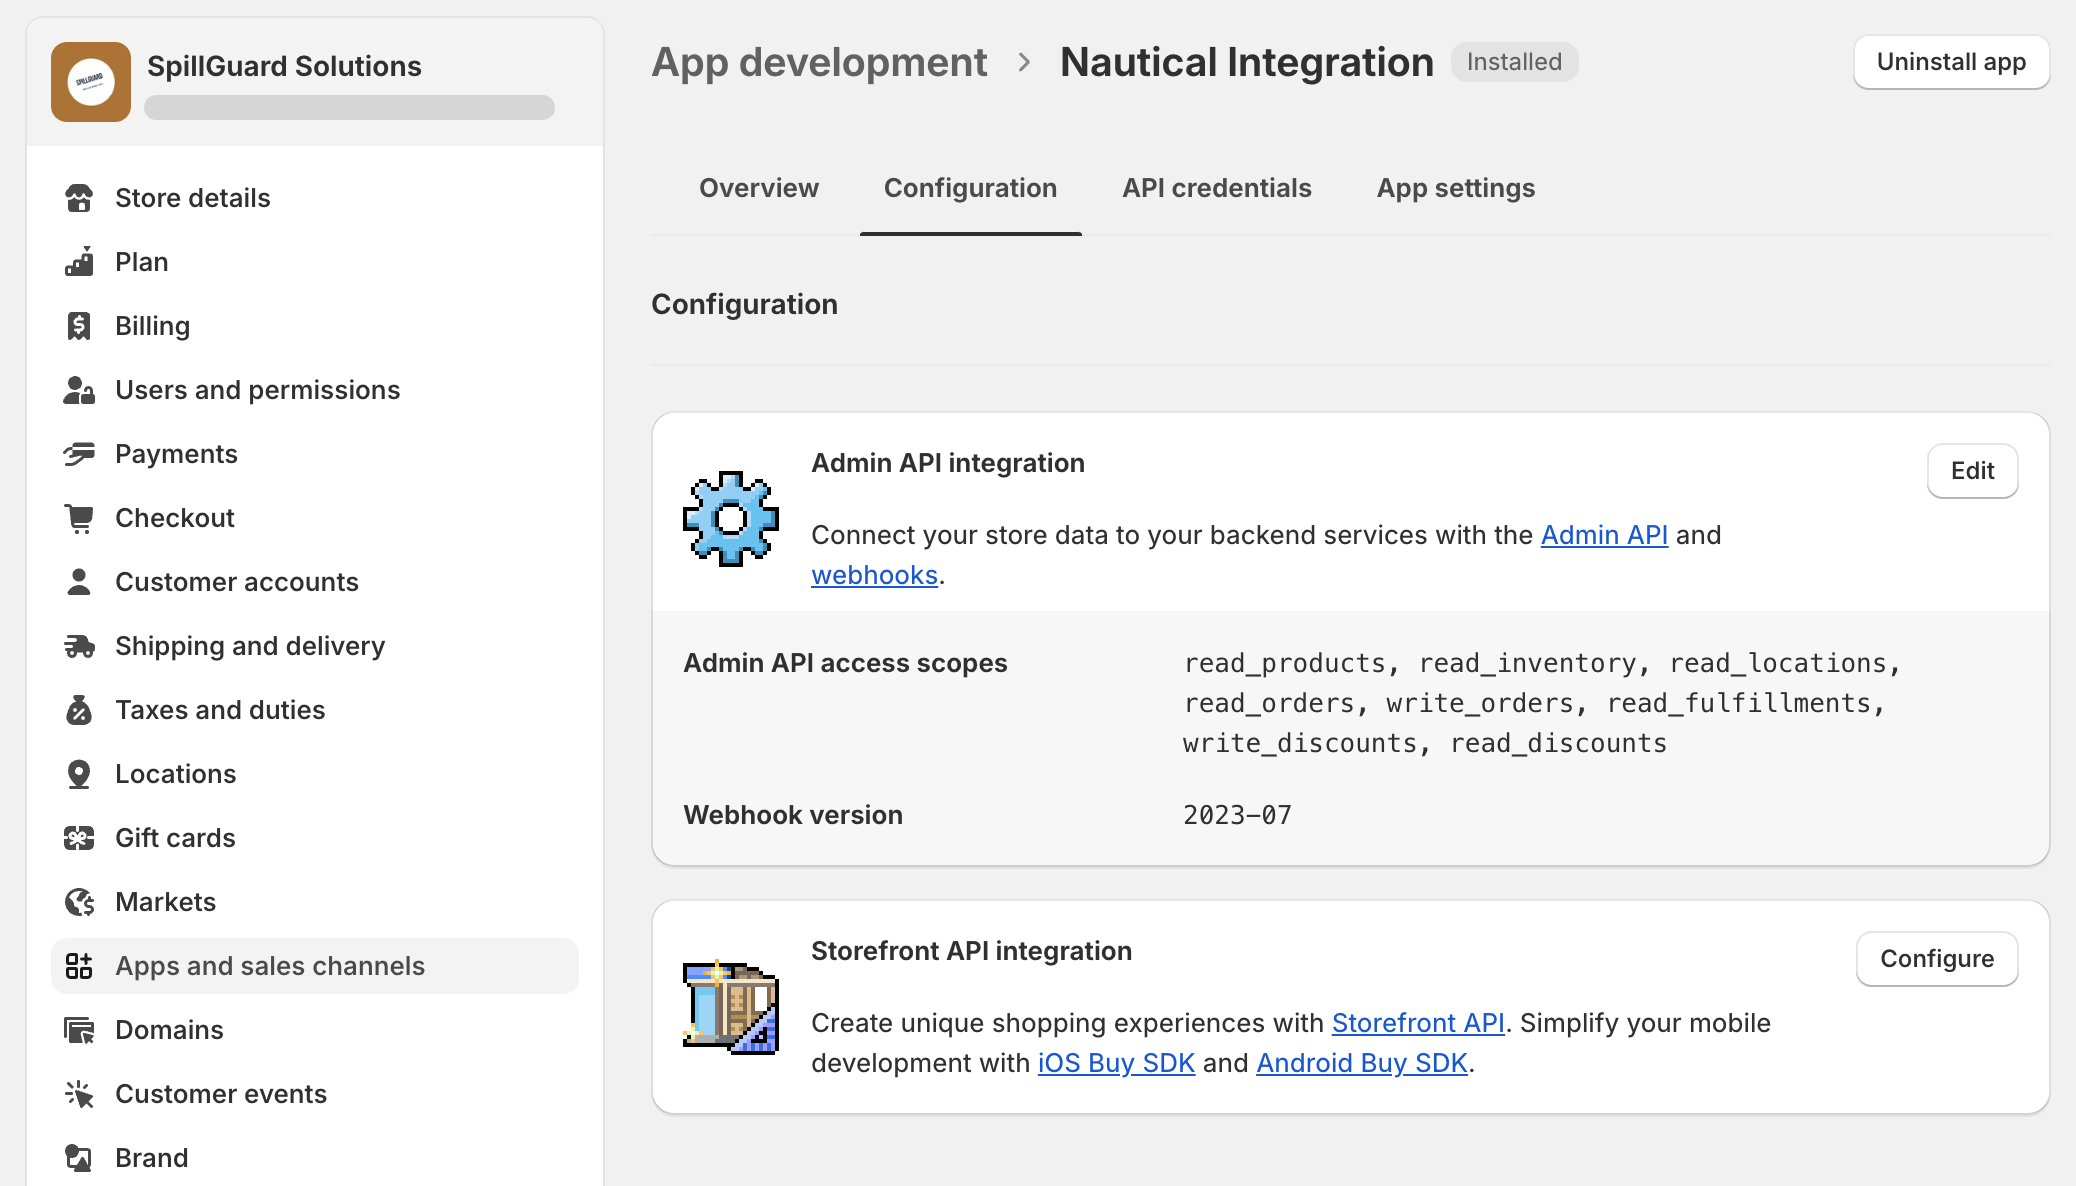
Shopify Admin API access scopes
When configuring Admin API scopes for your custom app in Shopify, be sure to grant the correct access scope for the types of data you wish to import and synchronize:
| Access scope | Required for |
|---|---|
read_fulfillments | Order sync |
read_inventory | Catalog import, Inventory sync |
read_locations | Catalog import, Inventory sync |
read_orders | Order sync |
write_orders | Order sync |
read_products | Catalog import, Product catalog sync, Product price sync |

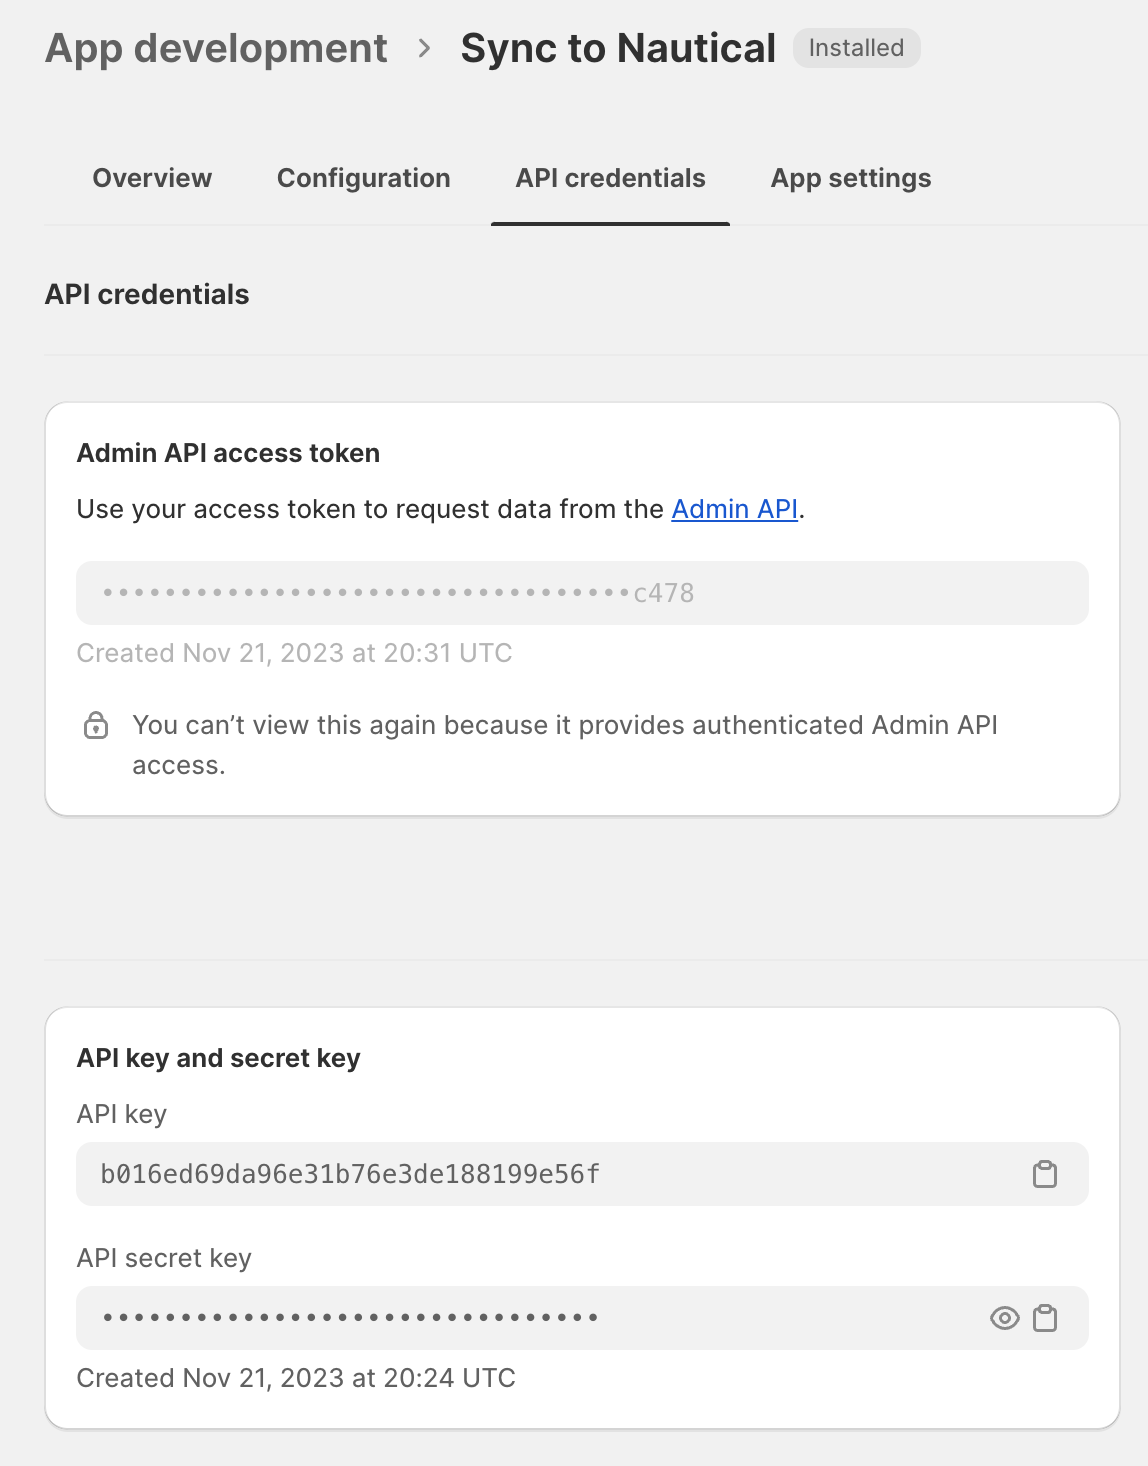
Retrieve API credentials
The custom app is where you must API keys required for activating the Nautical plugin. Once the app is configured, along with the appropriate Admin API scopes, retrieve the following from the API Credentials tab:
- Admin API access token
- API key
- API secret key

Step 2: Activate the Shopify integration
After configuring Shopify with a custom app for the connection, you can activate the Shopify app in Nautical to start syncing information between the two systems.
Before you start
Make sure to log in as the seller whose Shopify store you want to connect. Shopify configurations are seller-specific.
Steps
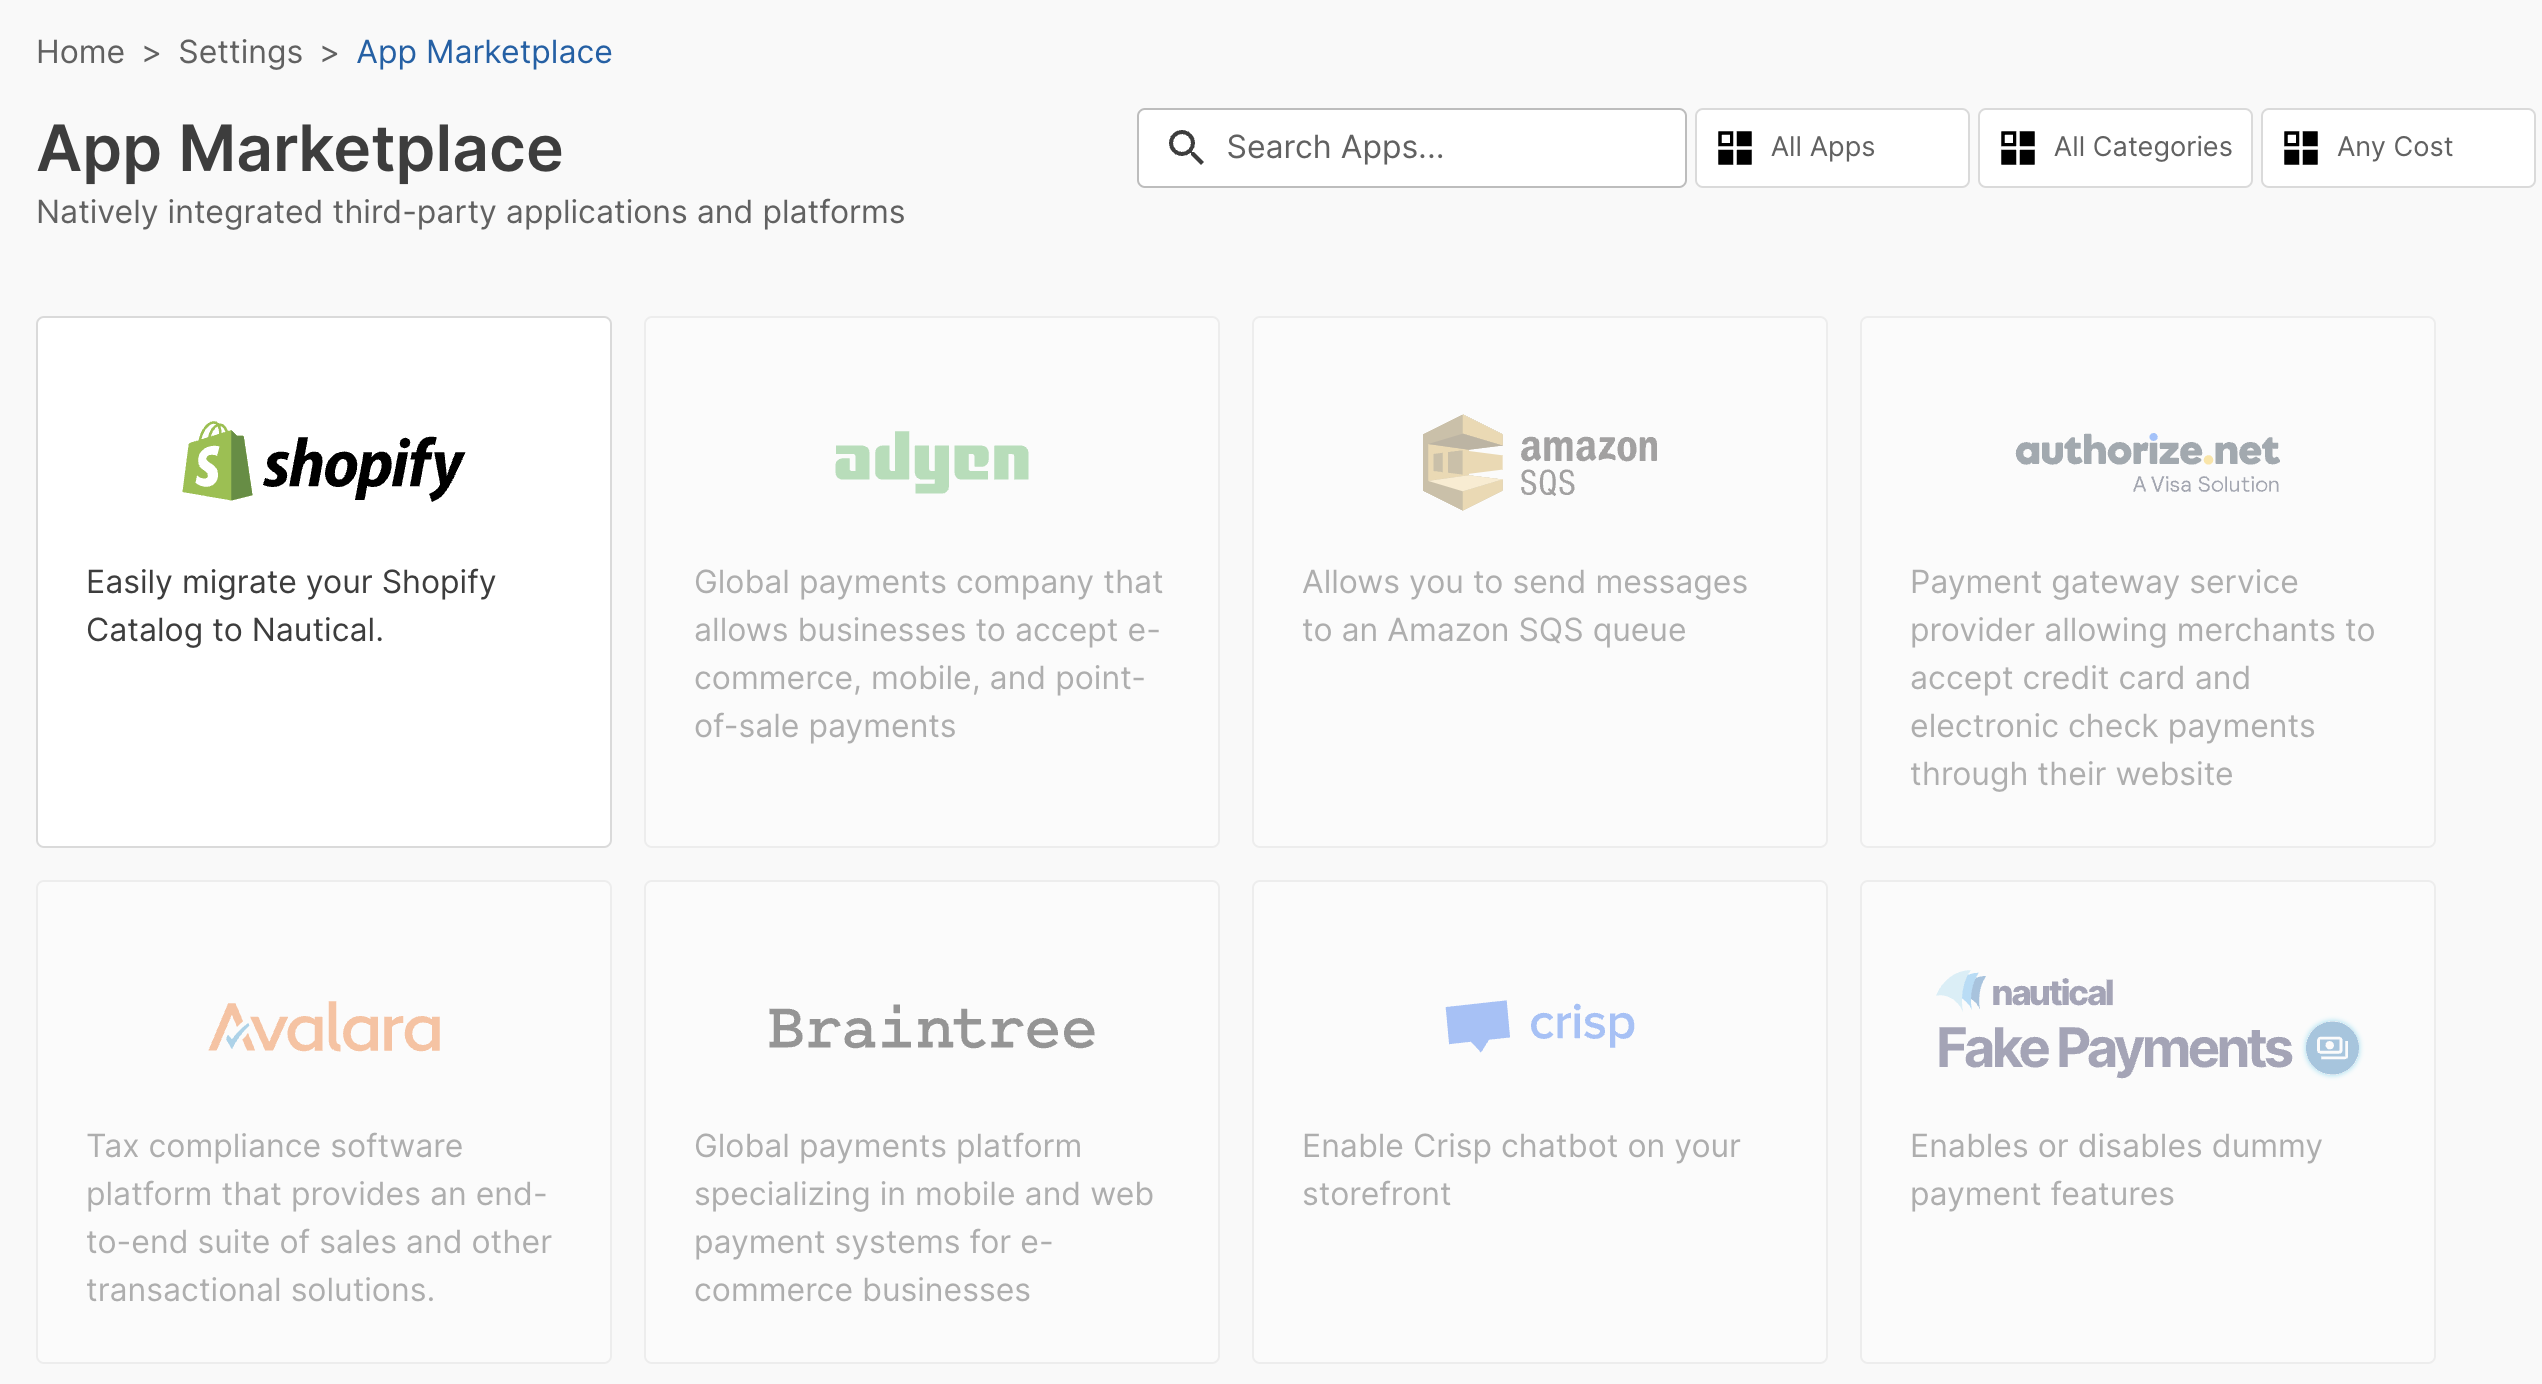
- In the dashboard, navigate to Settings -> Apps.
- Select Shopify.

- Complete the following fields:
| Field | Usage |
|---|---|
| Shop Domain | Enter your shop domain, such as example.myshopify.com. You can find this in your marketplace configuration settings, below your shop name and avatar. |
| API Version | Enter the API version used in your Shopify store setup. The default is 2022-01. |
| Default Shop Currency | Enter the 3-letter currency code for the seller's currency. This determines the currency used for imported product and variant prices. |
| Product Catalog Sync (Shopify to Marketplace) | Enable this setting to send product updates from the Shopify store to Nautical. |
| Product Price Sync (Shopify to Marketplace) | Enable this setting to send product prices from Shopify to the marketplace. If not enabled, the marketplace can set different product prices that won't sync with the regular product catalog sync. |
| Inventory Sync (Shopify to Marketplace) | Enable this setting to send inventory changes from the Shopify store to Nautical when there are changes in Shopify inventory due to orders or restocking. |
| Order Sync (Marketplace to Shopify) | Enable this setting to sync orders originating from Nautical with the Shopify store. |
| Admin API Access Token | Enter the Admin API access token retrieved from your custom Shopify app. |
| API Key | Enter the API key retrieved from your custom Shopify app. |
| API Secret Key | Enter the API secret key retrieved from your custom Shopify app. |
- Select Save.
- Select Activate.
Step 3: Import your Shopify product catalog
After successful activation of the Shopify plugin, the Actions section appears, where you can trigger the import to Nautical.
Steps
- In the dashboard, navigate to Settings -> Apps -> Shopify.
- Under Actions, select Import Catalog.
Result
All products, variants, and locations will be imported from Shopify.
The duration of the product catalog import depends on the size of the product catalog. The seller account who triggered the import will receive a "Import Catalog Successful" email once the import is complete.
Step 4: Tasks after product catalog import
After importing products from Shopify, additional work may be required to
-
Assign shipping zones: Shipping zones must be assigned to each warehouse imported from Shopify. Shipping zones are required to allow buyers to complete checkout and determine shipping rates.
-
Organize categories: Default categories are imported using the "Product template" from the Shopify store. Consider re-assigning the product categories as appropriate for your marketplace navigation. Changing the category does not affect the product sync.
-
Approve products (if required): If products require approval in the marketplace, the operator must approve each imported product and variant before they are available for purchase.
How data is synchronized
Nautical and Shopify communicate through webhooks to send updates to each other. These webhooks enable near real-time updates for the product catalog, orders, and inventory, based on the synchronization toggles configured on the plugin.
Product catalog sync
Product catalog sync is a one-way synchronization from Shopify to Nautical. The following changes are synced to Nautical:
- New products and variants.
- Updates to existing products and variants.
- New product images.
- Deleted images are not removed in Nautical.
- Deleted products and variants are not removed in Nautical, instead:
- The inventory is reduced to
0. - The
externalIDlinking the product or variant to Shopify is removed.
- The inventory is reduced to
Product price sync
Product price sync is a one-way synchronization from Shopify to Nautical.
- When enabled, changes to product and variant prices in Shopify are imported to Nautical
- If this toggle is not enabled, the price is initially imported but not synced, allowing marketplace operators to set their own prices independently
Inventory sync
Product inventory sync is a one-way sync from Shopify to Nautical. The following changes are synced to Nautical:
- "Track Quantity" field updates.
- Stock quantity updates.
- New locations.
- Updates to existing locations.
- Deleted locations do not delete the warehouse in Nautical, instead the inventory will be updated to
0at the respective warehouse.
Order sync
Order sync is a two-way synchronization between Nautical and Shopify. However, different events have different sync directions. The following list provides more information:
- Orders placed in Nautical are synced to Shopify. Orders originating in Shopify are not synced.
- Customer shipping address changes in Nautical are sent to Shopify.
- Order cancellations originating from either Nautical or Shopify will be synced to the other system.
- Fulfilling an order from Shopify creates a fulfillment on the seller order in Nautical. Fulfillments in Nautical are not synced to Shopify.
How product catalog data is imported
At a high-level, the following entities are imported from Shopify:
- Products -> Create products, product templates, and categories
- Variants -> Create variants and variant attributes
- Locations -> Create warehouses
The following sections explain how fields and other data from Shopify are imported to Nautical.
Shopify product import
During Shopify catalog import, products create products, product templates, and categories in Nautical.
The following product data is not imported from Shopify:
- Product category
- Tags
- Compare-at-price
- Cost per item
- Barcode (ISBN, UPC, GTIN, etc.)
- Continue selling when out of stock
- Metafields
The following data is imported from Shopify products. Select a data point to learn how Nautical imports the data.
Source
Products from Shopify are marked in Nautical with externalSource set to nautical.fulfillment.shopify.
Product ID
Populates the product externalId API field. You can find the product ID from the last part of the URL when viewing the product in your Shopify admin console.
Title
Used for the product "Name" and "Slug". The first 70 characters generate the "SEO Title".
Description
Populates the product "Description". The first 300 characters generate the "SEO Description".
Status
Populates the product "Available for purchase" field. When the Shopify product is in the "Active" state, the availability date is the date of product import. When the Shopify product is in the "Draft" state, the product will be set to not available for purchase.
Publishing
Toggles the "Published" and "Show in product listings" fields on or off. If the product is published in Shopify, the product will be published and visible in Nautical.
Media
Images from Shopify are imported to the product. Image descriptions are not imported.
Product type
Populates the category "Name" in Nautical. Also used to generate the first part of the product template "Name". If empty, a default of "Shopify" is populated in the product template name.
The product template imported from Shopify is named in the format:
{Product type | Shopify}{Physical | Digital}{Variant attributes}
For example, Shopify Physical or T-Shirts Physical Size Color.
Vendor
Populates the product "Manufacturer" and "Brand" in Nautical.
Charge tax on this product
Toggles the "Charge taxes on this product" field on or off in Nautical.
Track quantity
Toggles the "Track Inventory" field on or off in Nautical and determines how quantity is imported for the product.
This is a physical product
Toggles the "Is this product shippable?" field on or off on the product template in Nautical. This determines if the product is a physical or digital product template and influences the product template name.
Weight
Populates the product "Weight" in Nautical.
When the Shopify store uses a different weight unit than Nautical, the weight will be converted to the weight unit used in the marketplace. For example, a 2 LB product in Shopify will be imported as 0.907 kg in a marketplace configured to use KG as the Shipping Weight Unit.
Shopify variant import
During the import process, each individual product variant from Shopify is imported into Nautical. The variant options, such as size or color, are imported to create variant attributes on the product template.
The following variant data is not imported from Shopify:
- Compare-at-price
- Cost per item
- Barcode (ISBN, UPC, GTIN, etc.)
- Continue selling when out of stock
The following data is imported from Shopify variants. Select a data point to learn how Nautical imports the data.
Default variant
The first variant in Shopify is set as the default variant in Nautical.
Variant ID
Populates the product externalId API field. You can find the variant ID from the last part of the URL when viewing the variant in your Shopify admin console.
Images
Variant images from Shopify are imported to the product and selected on the variant.
Variant options
Each option and its values are imported to create "Attributes" that are populated on each product variant.
These options are added as variant attributes on the product template created for the product.
Price
Populates the "Price".
The price "Currency" is set using the "Default Shop Currency" configured on the Shopify plugin.
Charge tax on this product
This setting toggles the "Charge taxes on this product" field on or off at the product level, but it is imported only from first variant in Shopify at the time of import.
SKU
Populates the "SKU" field on the variant. If blank, a default SKU is assigned.
Track quantity
Toggles the "Track Inventory" field on or off and determines how quantity is imported for this variant.
Quantity
Sets the inventory available at each warehouse, which you can view from the variant "Inventory" section.
- If quantity is tracked on the variant, the exact amount of stock available at each location is imported. Shopify locations are imported as warehouses.
- If quantity is not tracked, a baseline of 1000 units of stock is registered at the default warehouse to prevent any issues with insufficient stock at checkout.
Weight
Populates the variant "Weight".
When the Shopify store uses a different weight unit than Nautical, the weight will be converted to the weight unit used in the marketplace. For example, a 2 LB variant in Shopify will be imported as 0.907 kg in a marketplace configured to use KG as the Shipping Weight Unit.
Shopify locations import
Locations are imported as seller warehouses in Nautical.
Shipping zones are not imported from Shopify. You must assign the appropriate shipping zones and rates to each warehouse imported from Shopify, otherwise buyers will not be able to purchase products imported from Shopify.
The following data is imported from Shopify locations. Select a data point to learn how Nautical imports the data.
Seller
The owner of each imported warehouse is assigned to the seller attached to the Shopify plugin configuration.
Address
The location address fields are imported to the warehouse address.