Customize Email Templates
A SendGrid template is a pre-designed email format that allows emails to be generated and sent from Nautical events and payloads. Templates can be customized with text, images, and other content. Nautical automatically creates templates in SendGrid after activation.
After successfully activating SendGrid, Nautical automatically creates all of the email templates and configuration required for the standard notification events. The templates are a starting point that you can customize to your brand voice and design.
Add an email template
Occasionally, new email events are added as we expand Nautical's capabilities. SendGrid email templates are only created automatically after first activating the app in Nautical.
When an upgrade introduces a new email event, you must create the template manually in SendGrid, then connect the template to the email event in Nautical.
Steps
- Log into the SendGrid Dashboard.
- In the left navigation pane, go to Email API -> Dynamic Templates.
- Select Create a Dynamic Template.
- Enter a name for the template, and then select Create.
- Design the template as desired.
- Save the template, and ensure it's set to Active.
- Make note of the Template ID.
- Go to the Nautical dashboard.
- Go to the Settings area, and open one of the following pages to manage email templates and their settings:
- Customer email templates: Manage emails sent to buyers.
- Staff email templates: Manage emails sent to marketplace operators and sellers.
- Locate the email template, and fill in the following fields:
- Copy-paste the Template ID from the SendGrid template you created.
- Ensure the Activate toggle is on.
- Fill in the CC and BCC fields, if desired.
- Select Save.
Edit an email template
- Log into the SendGrid Dashboard.
- In the left navigation pane, go to Email API -> Dynamic Templates.
If you've activated the SendGrid app, you will a list of templates automatically created by Nautical. - Expand the email template you want to edit.
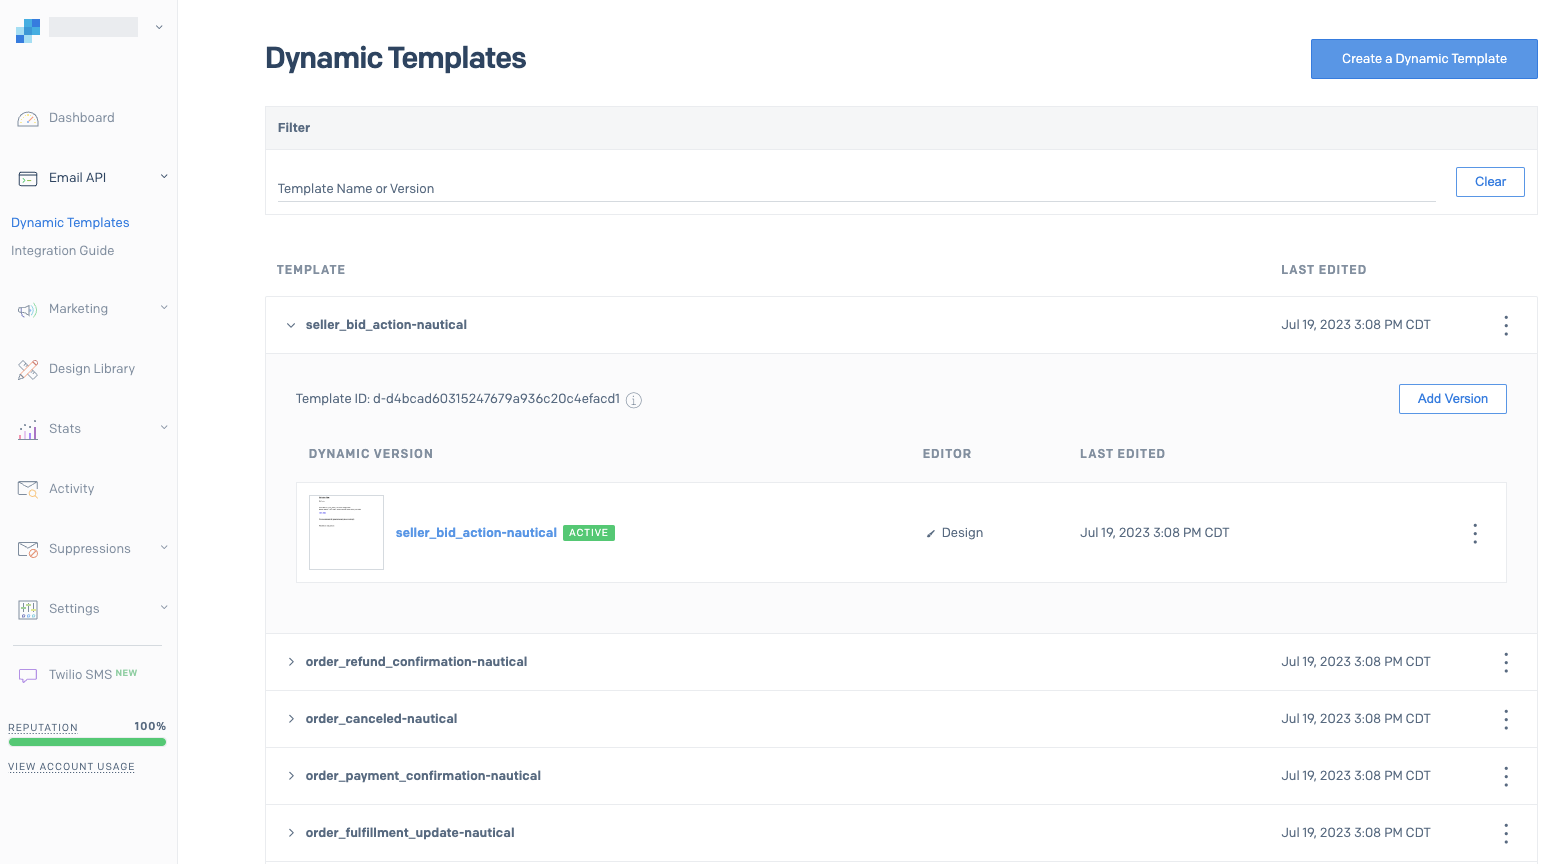
SendGrid email templates - Choose one of the following methods to edit the template:
- To create a new version with your edits, select Add Version. The previous version will be saved in the template version history.
- To edit an existing version, under Dynamic Versions, expand the three-dot actions menu and select Edit.
- Make the desired edits to the template.
For more information, see SendGrid's Design & Code Editor documentation. - Set the version you wish to use to Active.
The version will be used to generate emails for that event going forward.
Tutorial: Build a dynamic template in SendGrid
Scenario
Throughout this tutorial we will update the staff_password_reset_template, which has the following payload available:
{
    "recipient_email" : ["required"], // Required recipient email address
    "recipient_name": "optional", // Optional recipient name
    "domain": "site domain", // Site domain
    "site_name": "site name", // Site name
    "logo_url": "logo url", // URL of the site's logo
    "user": {
        "id": 234, // User ID
        "email": "user email", // User email address
        "first_name": "user first name", // User first name
        "last_name": "user last name", // User last name
        "is_staff": true, // Flag indicating whether the user is staff
        "is_active": true, // Flag indicating whether the user is active
        "private_metadata": "...", // User's private metadata (if it exists)
        "metadata": "..." // User's metadata (if it exists)
    },
    "token": "", // Token
    "reset_url": "redirect url to reset password" // URL for resetting password
}
The payload has all of the dynamic variables that are available for you to use in the staff_password_reset_template email. For example, if you want your email to start with, "Hi Mike!," then from the payload you would use "first_name" as the dynamic variable. When adding that dynamic element to the SendGrid template you will need to wrap "first_name" in double handlebars: {{first_name}}.
Before you start
You can follow along this tutorial to edit any template in SendGrid. Prepare the following before you start:
- Plan the email you want to create and identify which parts require dynamic tokens
- Gather any images you want to include, such as your logo
- If adding colors to the email, gather the hex color codes
- Locate the JSON payload for the email template you want to modify.
Steps
Log into your SendGrid Dashboard.
From the left navigation pane, expand Email API and open Dynamic Templates.
Expand the template you want to modify, and then select Add Version.
For this example, we will open thestaff_password_reset_templatetemplate:On the Select a Design page, select Blank Template.
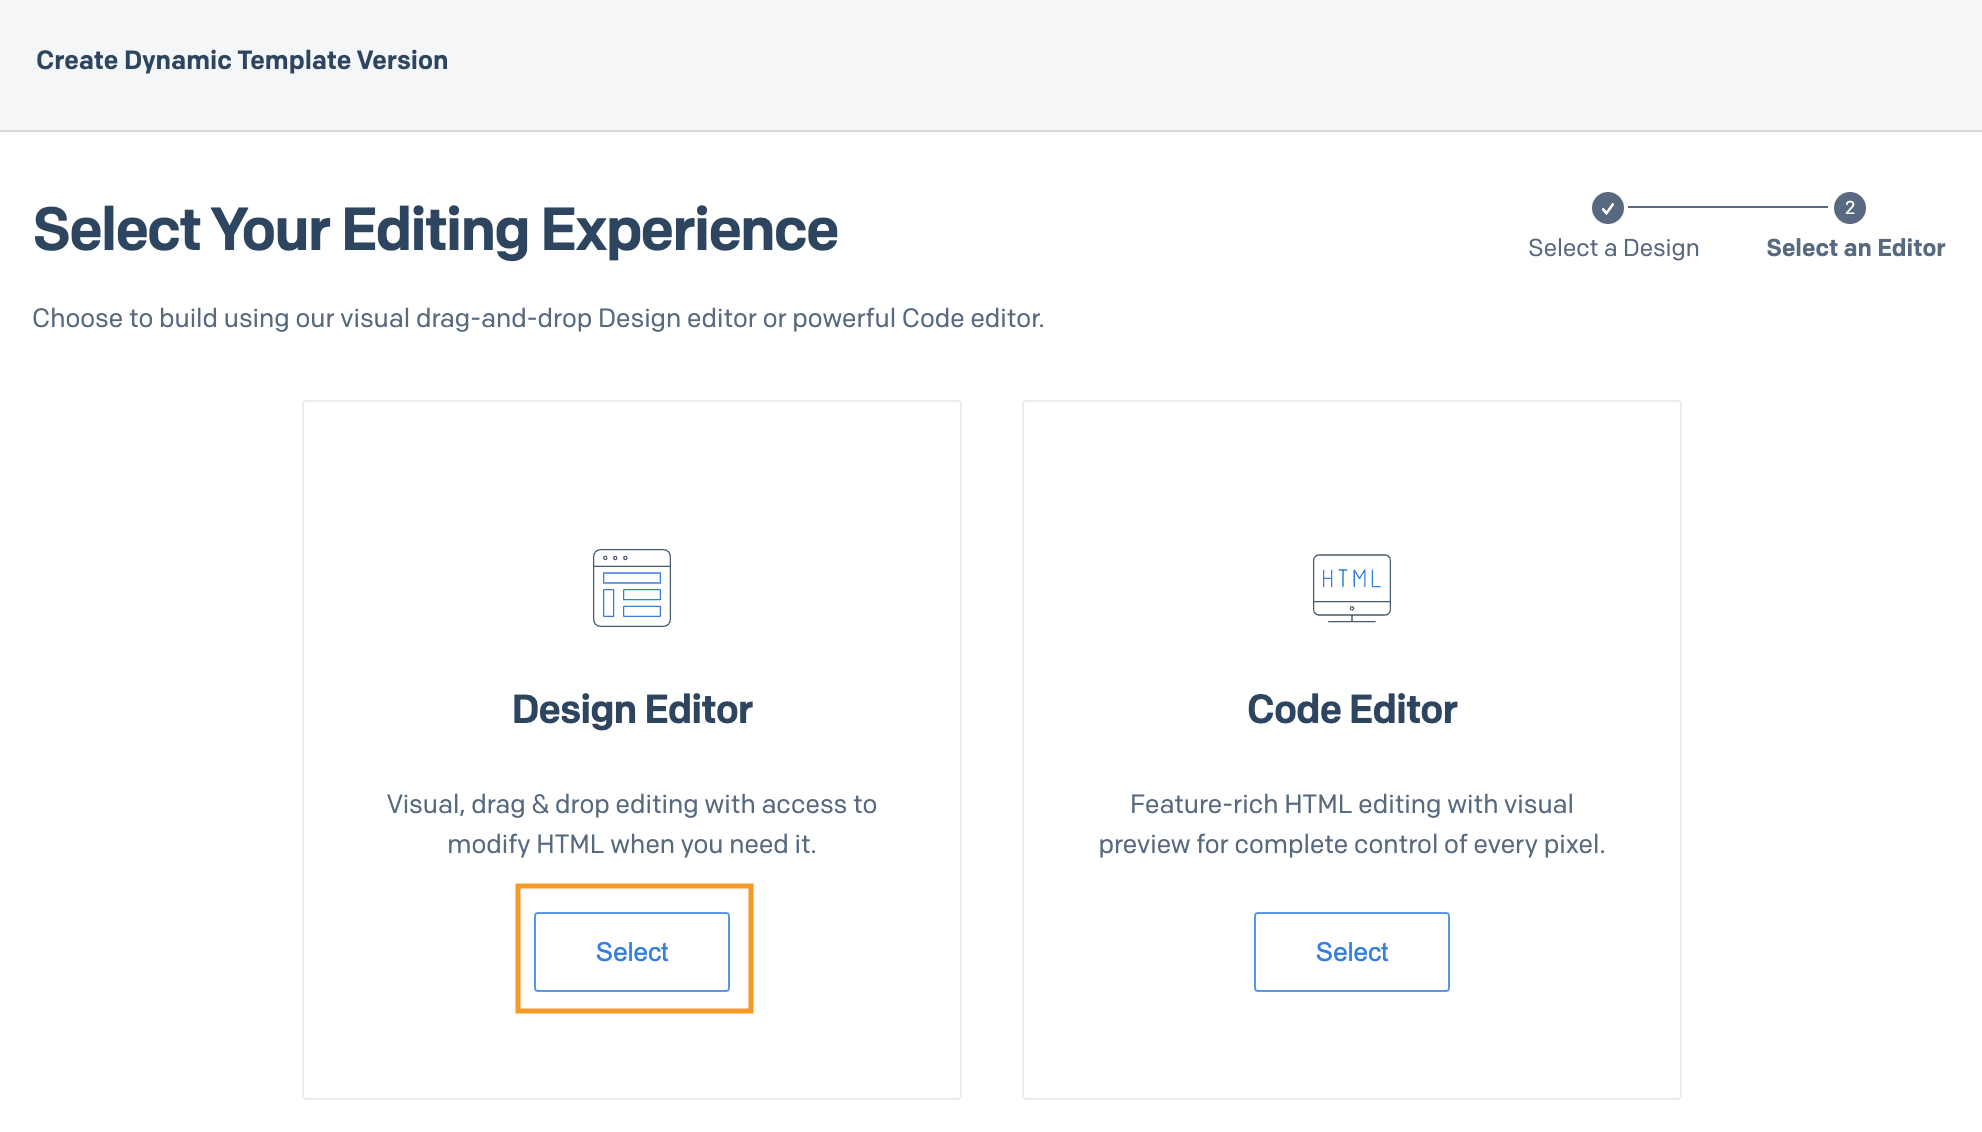
On the Select Your Editing Experience page, select Design Editor.
Under Settings -> Dynamic Version Settings, enter the following information:
- Version Name: The name of your template version. For example,
staff_password_reset_template_v2. - Subject: The subject line for your email. For example, "Password reset request."
- Version Name: The name of your template version. For example,
In the top bar select the Build tab.
The Add Modules section appears that you will use to build the email.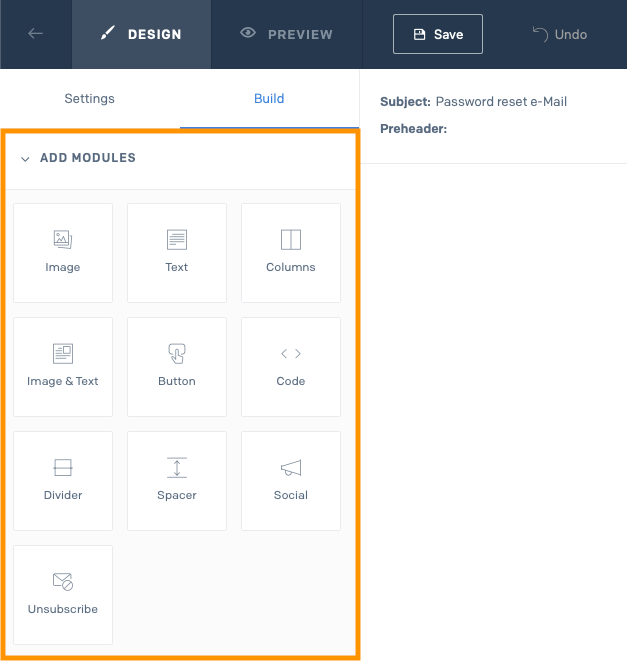
Customize the email to your preferences.
For example, we will make the following modifications to thestaff_password_reset_template_v2template:- Add body text: Add a Text module and enter text to appear in the email:
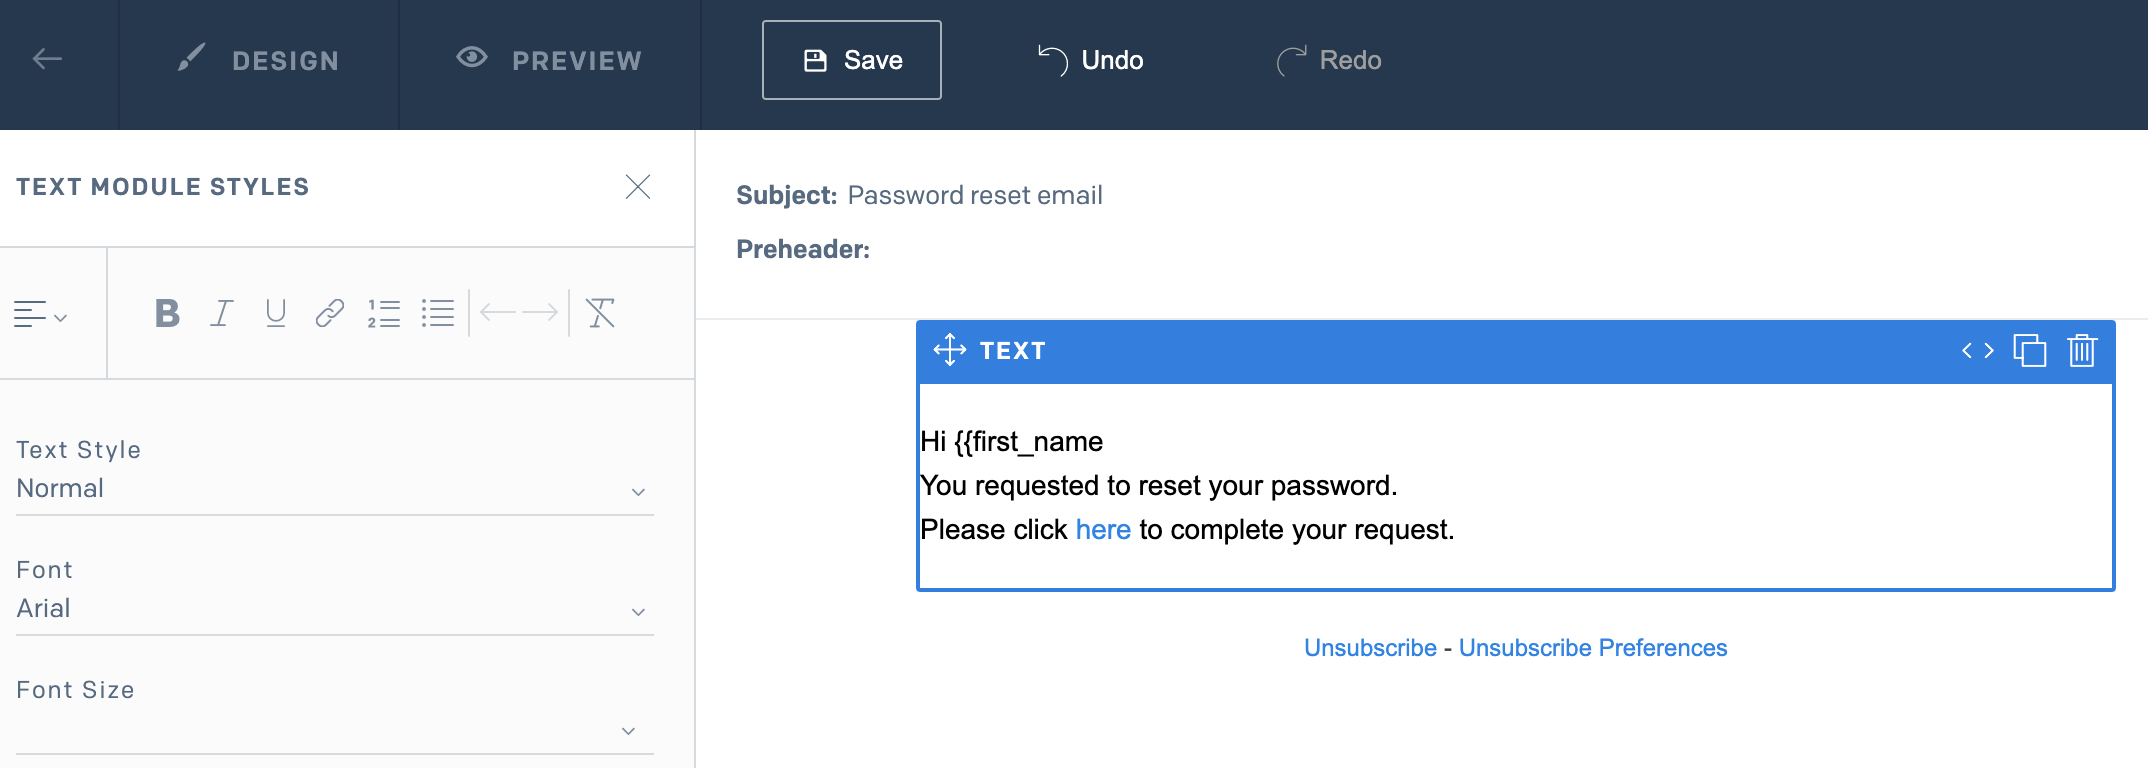
tipAnywhere you will be using a dynamic variable you can simply enter it into the template with handlebars.
Add color bars: Add more Text modules above and below the first module, and change the background color to yellow (hex code
#FFC50E):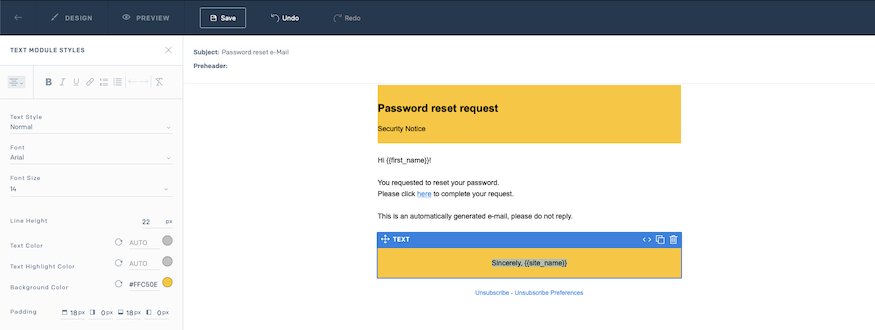
Add the logo:
- Drag-and-drop an Image module above the top text box.
- Upload the image using the window that appears, and then select Insert Image to add it to the email template.
- (Optional) After inserting the image, click on edit image and turn off Image Responsiveness.
- Add body text: Add a Text module and enter text to appear in the email:
When you're done editing the template, select Save.
To activate the new version of the template, return to the template from Email API -> Dynamic Templates, and set the version to Active from the three-dot actions menu:
Preview the template
Once a template is ready, you can preview the dynamic variables with test data.

You can populate a sample JSON payload, for example for the reset password scenario we could use populate mock data as the values:
{
    "recipient_email" : "mike.smith@example.com",
    "recipient_name" : "Mike Smith",
    "domain" : "juicemarketplace.com",
    "site_name" : "Juice Marketplace",
    "logo_url" : "https://storage.googleapis.com/juice_logo.png",
    "user" : {
         "id" : 234,
         "email" : "mike.smith@example.com",
         "first_name" : "Mike",
         "last_name" : "Smith",
         "is_staff" : true,
         "is_active" : true
    },
    "token" : "129384qw7yie",
    "reset_url" : "https://juicemktpl.com"
}
Or you can create a smaller test dataset as a subset of the full payload:
{
    "recipient_email" : "mike.smith@example.com",
    "user" : {
         "first_name" : "Mike",
    },
    "reset_url" : "https://juicemktpl.com"
}