Sales
With sales, marketplace operators can offer automatic discounts to customers on your marketplace. Sales help attract more customers by with various promotion options:
- Create sales to offer product discounts or free shipping that automatically apply.
- Product sales can be a fixed-rate price reduction (for example, $20 off) or a percentage discount (for example, 20% off).
- Product sales can apply to individual variants, groups of products, entire categories, or collections.
- Offer volume discount sales by requiring a minimum number of items in the cart.
- Sales are flexible in duration and you can choose the date for it to expire or let them go on indefinitely.
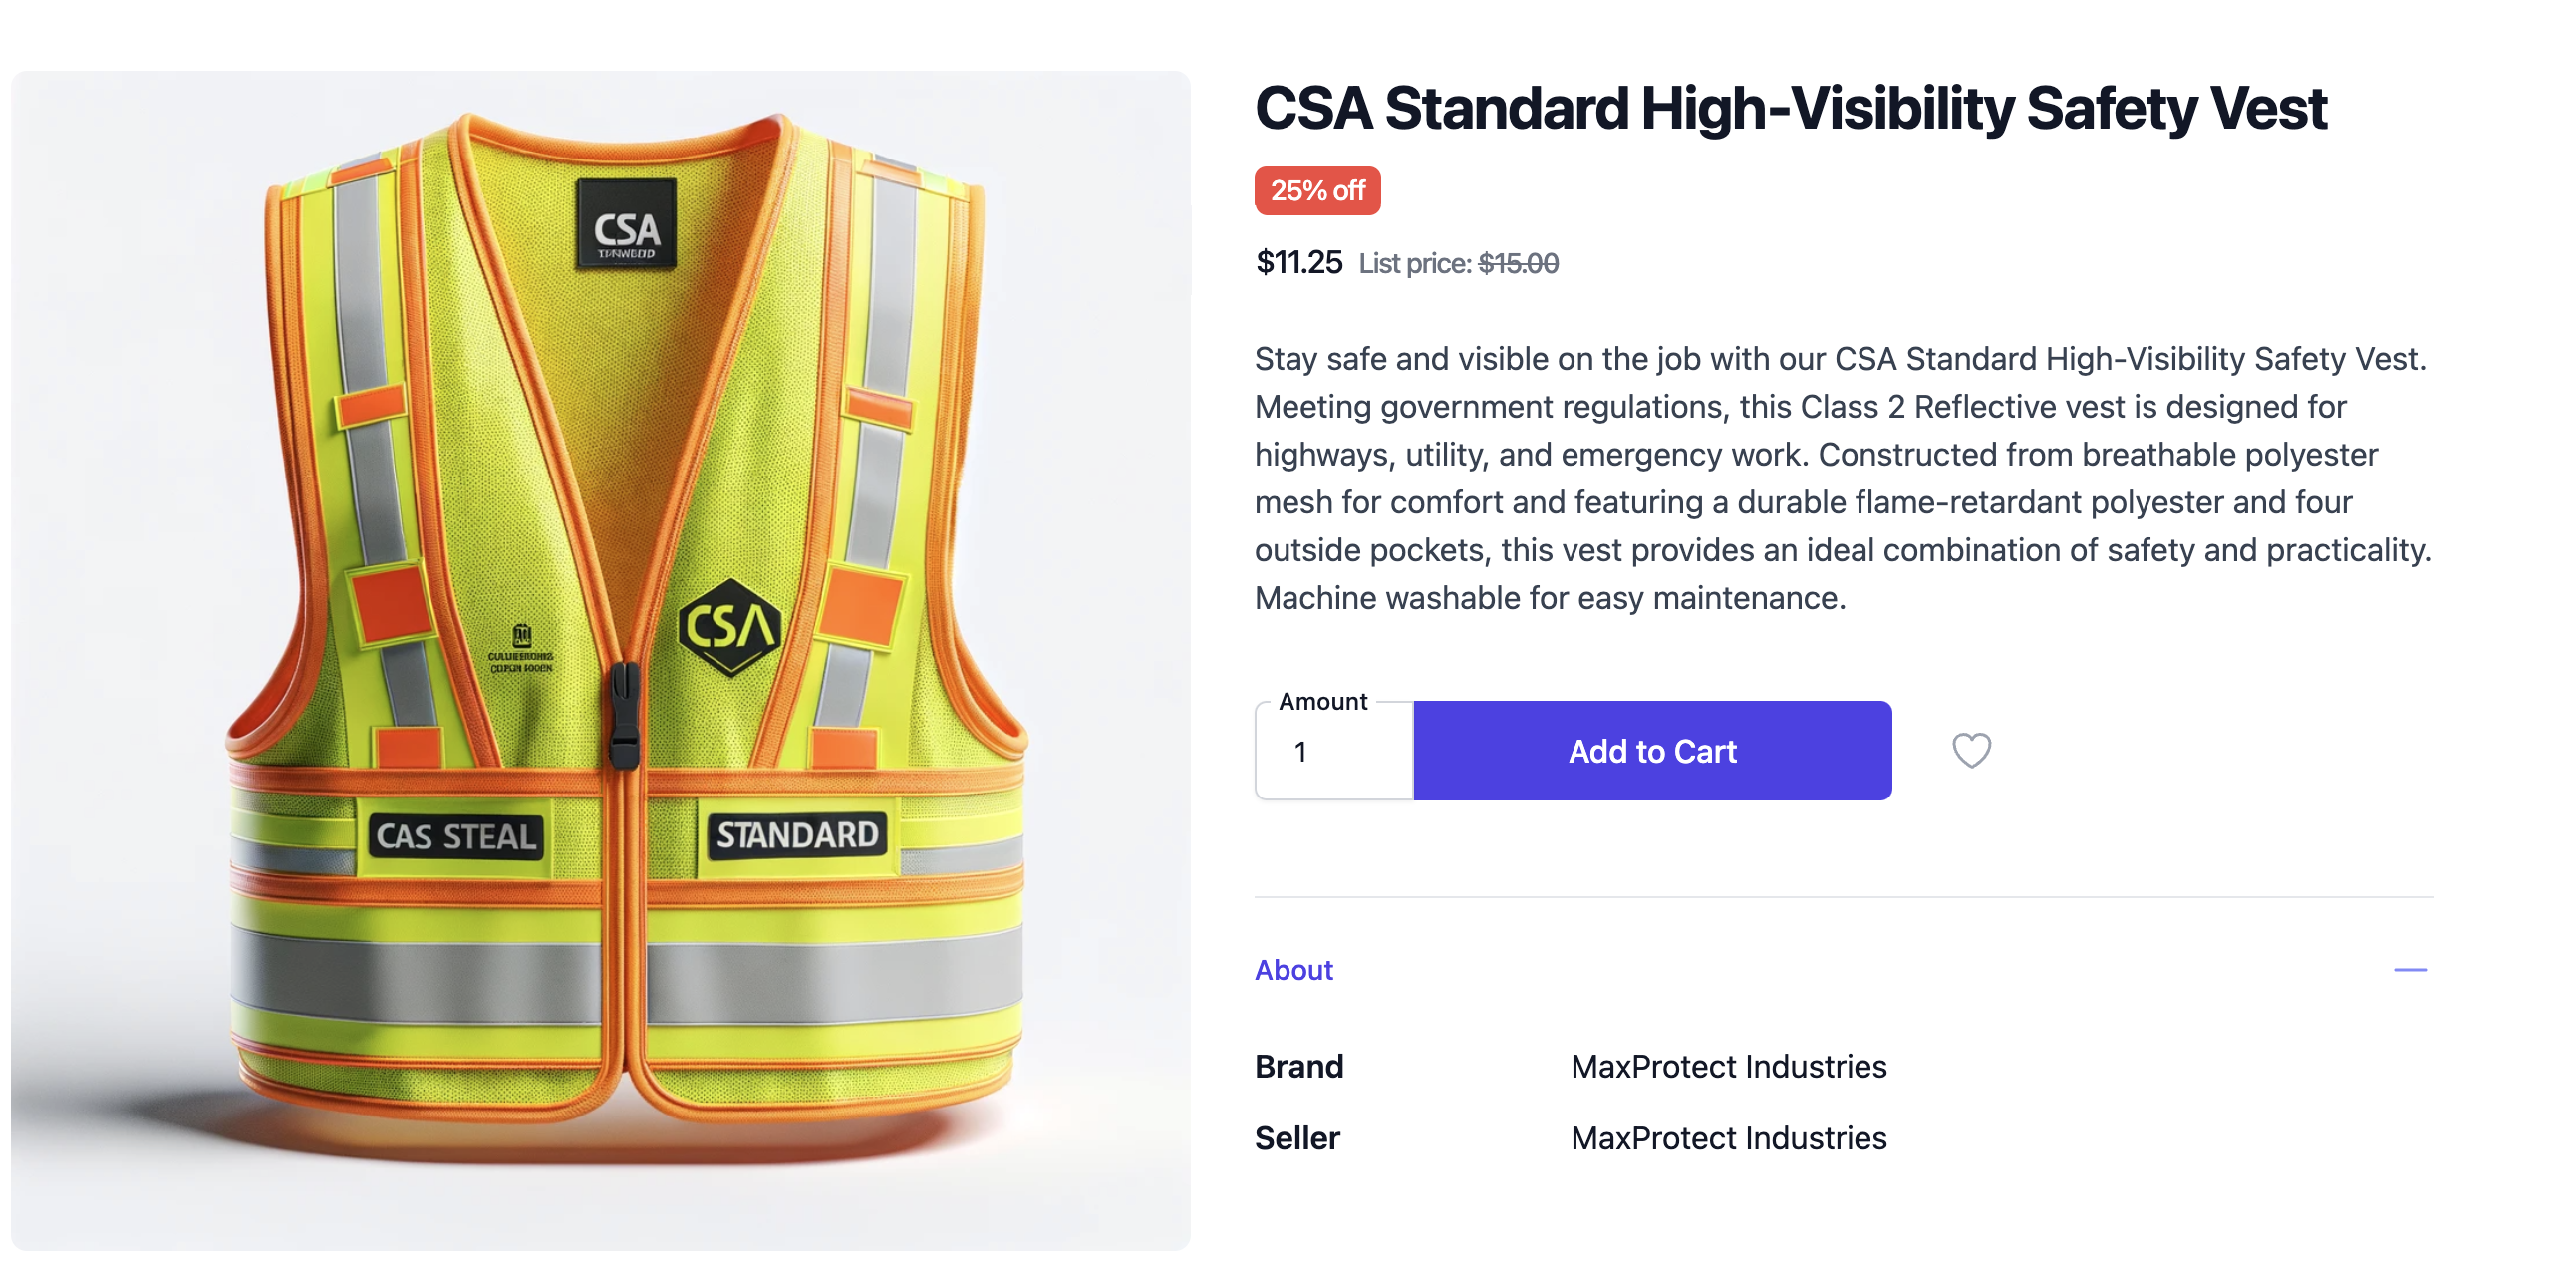
The storefront displays on-sale products with a sale badge and displaying the sale price side-by-side with the original price:
Add a product sale
Product sales apply a fixed amount or percentage discount to a selection of products you choose after creating the sale. These discounts automatically apply to eligible products in the cart.
You can set minimum criteria for the sale, such as a minimum number of products (volume discount) or a minimum cart subtotal.
Step 1 - Create the sale
- In the dashboard, navigate to Discounts -> Sales.
- Select Create sale.
- Input the sale's name.
- In the Discount type sub-section, select Product discount.
- Choose the discount amount:
- To offer a percentage discount:
- Set Discount value to Percentage.
- Enter the Percentage to discount products by.
- To offer a fixed amount discount:
- Set Discount value to Fixed.
- Enter the Fixed amount to discount products by.
- To offer a percentage discount:
Step 2 - Define minimum requirements (optional)
- In the Minimum requirements sub-section:
- To offer this sale on all orders, select No minimum.
- To require a minimum number of items to qualify for this sale:
- Select Minimum items in cart.
- Use the Minimum number of items field to enter the minimum quantity of items in the cart. To require a minimum cart subtotal to qualify for this sale:
- Select Minimum purchase amount.
- Use the Minimum purchase field to enter the minimum amount before tax and shipping.
Step 3 - Set active dates (optional)
- In the Active Dates subsection, set the start and end dates for your product sale:
- Start date: To set a start date, set the date and time for when the product sale is active. If you leave the start date blank, the sale begins right away.
- End date: To set an end date, select Set end date, and then enter the date. If you leave the end date blank, the sale goes on indefinitely.
Step 4 - Save the product sale
- When you are done, select the Create button.
Step 5 - Assign products to a sale
- In the dashboard, navigate to Discounts -> Sales.
- Select the sale you want to assign products to.
- To put a product on sale, select it by navigating to one of the following in the dashboard:
- Categories: Put all products in a selected category on sale.
- Collections: Put all products in a selected collection on sale.
- Products: Put each of the selected products and their variants on sale.
- Variants: Put only the selected variants on sale.
- Select the Assign button.
- Choose one or more items from the list. Use the search bar to narrow the results.
- Select Assign.
Add a free shipping sale
To offer free shipping that automatically applies, you can create a free shipping sale. You can configure the sale to require minimum criteria or to apply to every order.
Step 1 - Create the sale
- In the dashboard, navigate to Discounts -> Sales.
- Select Create sale.
- Input the sale's name.
- In the Discount type sub-section, select Free shipping.
Step 2 - Define minimum requirements (optional)
- In the Minimum requirements sub-section:
- To offer free shipping on all orders, select No minimum.
- To require a minimum number of items to qualify for free shipping:
- Select Minimum items in cart.
- Use the Minimum number of items field to enter the minimum quantity of items in the cart. To require a minimum cart subtotal to qualify for free shipping:
- Select Minimum purchase amount.
- Use the Minimum purchase field to enter the minimum amount before tax and shipping.
Step 3 - Set active dates (optional)
- In the Active Dates subsection, set the start and end dates for the free shipping sale:
- Start date: To set a start date, set the date and time for when the free shipping sale is active. If you leave the start date blank, the sale begins right away.
- End date: To set an end date, select Set end date, and then enter the date. If you leave the end date blank, the sale goes on indefinitely.
Step 4 - Save the free shipping sale
- When you are done, select the Create button.
View active sales on a product
Any active sales that apply to a product are visible from the product and variant pages.
View product sales
- In the dashboard, navigate to Products -> Listings.
- Select the product whose active sales you want to view.
- Select Discounts.
- View active sales in the Associated sales sub-section.
View variant sales
- In the dashboard, navigate to Products -> Variants.
- Select the variant whose active sales you want to view.
- Select Discounts.
- View active sales in the Associated sales sub-section.
Manage sales
Edit a sale
- In the dashboard, navigate to Discounts -> Sales.
- Select the sale you want to edit.
- Edit the sale.
- Select Save.
Deactivate a sale
To deactivate a sale while keeping a record of it, set the sale's end date to the day you want it to be deactivated.
- In the dashboard, navigate to Discounts -> Sales.
- Select the sale you want to deactivate.
- In the Details section, enable the Set end date toggle.
- Set the End date to the day you want the sale to be deactivated.
- Select Save.
Delete a sale
Delete a sale to permanently remove it.
- In the dashboard, navigate to Discounts -> Sales.
- Select the sale you want to delete.
- Select Delete.
- Select Delete when the confirmation pop-up appears.